| Most will say that the stock ignition system of the Z32
is sufficient unless running extreme levels of boost. However there are
others that say they get increased throttle response and a slight performance
gain from this modification.
HKS's marketing gurus say "The Transistor Ignition controls current
to the coil via an impedance matching circuit, to produce a longer spark
duration. This powerful combination creates greater horsepower at higher
RPM levels and increased throttle response at lower RPM levels."
Whatever the pundits say, I am glad I did the install and I certainly
noticed a subtle difference particularly related to throttle response.
The car seems to idle and run a lot smoother too. This install was done
on my 1995TT by Turbodoug
Items:
HKS Twin Power Ignition Amplifier (TPIA)
Velcro or similar to mount the unit
Length of 12 Gauge Electrical Wire
Bullet Connector (1 male, one female)
Soldering Iron and Solder
Electrical Tape
Cable Ties (to make it all nice and tidy)
Procedure:
Fundamentally, the installation requires that the red wire go to a +12V
ignition source, the yellow wires go to the igniter wires on each coil
and the black wire goes to ground. The following steps outline the procedure
performed for my install.
1. Find a suitable mounting point for the TPIA, Mine is installed near
to the Power Steering Reservoir next to my HID ballast (1.). Mount
it by drilling a hole and screwing it down, or the velcro strips I used
provide more than adequate adhesion .
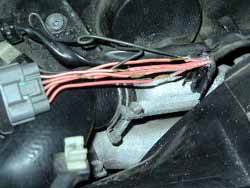
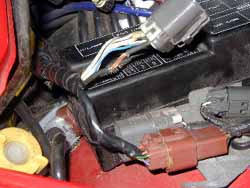
2. Disconnect the cable from the power transistor to the coil packs,
located at the front of the engine on the passenger side (2.). Disconnect
the plug with six wires coming out of it, one black and five red with assorted
stripes. The black wire has a long loop coming out of the insulation, this
is for checking the timing on cylinder #1.
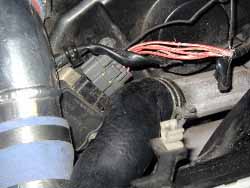
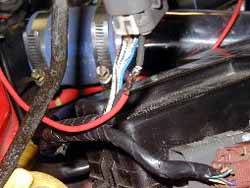
3. Cut back the black wire shield to expose the underlying wires (3.)and
then cut away the insulation on each wire for about 3/4". Stagger the cuts
to reduce the risk of unwanted shorts between the wires and also to make
a much neater job on the final wrap (4.).
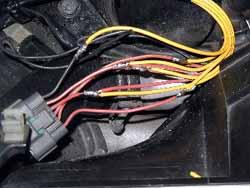
4. Route the wires from the TPIA harness to close to the stripped wires,
then cut the yellow ones to length. They should be of staggered lengths
to coincide with the exposed wires from step 3. Solder each yellow wire
to one of the igniter wires, it doesn't matter which one goes to which
as the wires are equivalent. Using the brass u shaped wire clips provided
with the TPIA helps here.
5. Using electrical tape insulate each joint separately and then rewrap
the wires together.
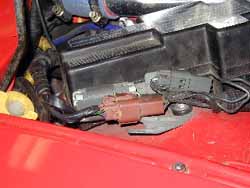
6. Find a source of 12V IGN power. Nissan's source of power for all
the ignition coils comes from the ignition coil relay located in the relay/fuse
box. It's located on the front driver side of the engine compartment. Next
to this box there is a brown connector, a large gray/white connector and
a gray connector. Disconnect the gray/white connector in figure (5.)
and expose about 3/4" of wire from the thick black cable (6.).
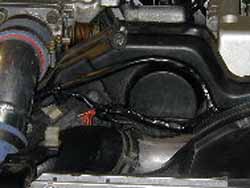
7. Run a new wire from close to the power transistor to the fuse box
connector disconnected in step 6. Run this parallel with the other PTU
wires across the front of the engine to get clearance from the fan, pulleys
etc. Solder it into the black wire exposed in step 6. and insulate it (7.).
Reconnect the gray/white connector.
8. Using a bullet connector (or similar electrical connector) join the
wire from step 7. to the red wire from the TPIA harness. By using a bullet
connector its possible to disconnect the TPIA and all wires in front for
maintenance reasons.
9. Insulate all the wires with electrical tape and tidy up everything
with cable ties (8.). Find a suitable ground connector (I used the
bracket on the Power Steering Reservoir which may not be the most ideal
was the best option given we were rushed and didn't feel like drilling
into the body) (9.).
10. Reconnect the battery and give it a try.... hopefully the car will
start and the red light on the TPIA illuminates.
elizium
Back to TECH |