| Here are some pics of my injector number one being removed and replaced by the Dremel method. There are more details on my web site. There are also links on my web page to two more detailed articles on the Dremel method. That should be more than enough information for anyone wanting to complete this job. Here is the TT.net link to the FAQ on diagnosing faulty injectors. Preferred Tools: Dremel brand rotary tool
#225 Flex-Shaft attachment for the Dremel can be very helpful
Tungsten carbide cutter bit #9901 or similar metal grinding bit
Phillips screwdriver (for old screws)
Allen wrenches, or better yet, ball-end Allen wrenches
Two 5mm x 14-16mm x 0.8mm stainless steel Allen screws per injector
Shop Vac
Replacement injector (duh!) and O-rings
PB Blaster, WD-40, Vaseline
Light source Time needed: About two hours, not counting the time for soaking the old injector overnight in PB Blaster for ease of removal Difficulty: 2 1/2 out of five. Requires a little finesse. Use a 5mm Allen wrench to remove the four cap screws that hold the throttle cover.
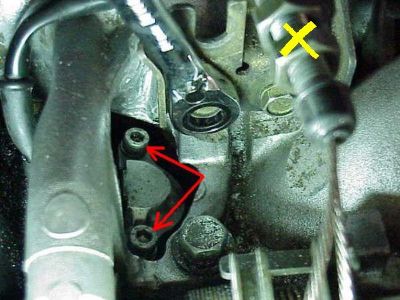
 For injector number one, loosen and set aside the throttle and cruise control cables (yellow X), and the throttle bracket. Red arrows are pointing to the two Allen screws that hold in injector number one. Gear wrench is on the throttle bracket. Remove the oil filler cap and stuff a rag in it.
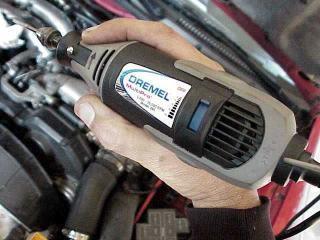
 The tool after which this technique is named.
 Grinding the plenum with the Dremel so that the cap screw by the red arrow will come out.
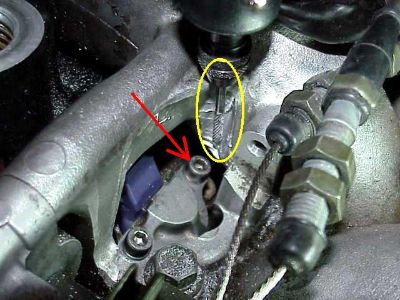 Use a Shop-Vac and a helper to suck the metal filings as you grind. Get straight over the top of the injector and look down between grindings. 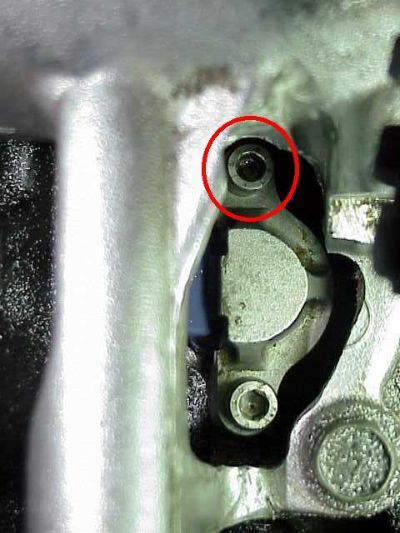 Remove the screw on the non-Dremel'd side first for a little more "fudge" room with the remaining screw.
 Cap screws are out, half-moon cover is off. I soaked the injector for 24 hours in PB Blaster at this point before even trying to remove it.
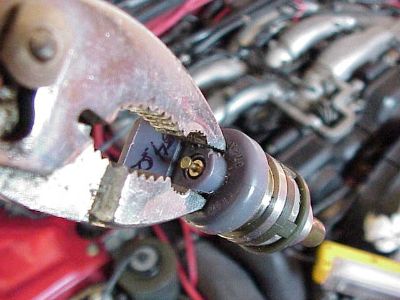
 This is how I grabbed the injector for both removal AND insertion. However, upon insertion I padded the pliers with a rag. Twist the injector back and forth first before trying to pull it out, to break the seal. Mine came out easy but these injectors had already been replaced once. Expect original injectors to be tougher.
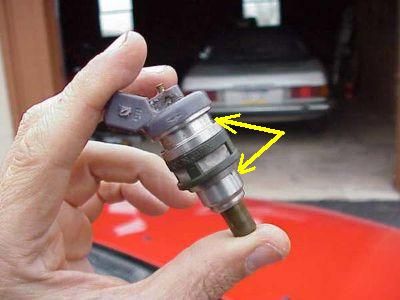
 There are two O-rings and a half-moon little rubber gasket that go with each injector.
 I coat the O-rings with Vaseline and squirt a little WD-40 into the lower plenum socket where the injector seats. The yellow arrows show where the O-rings go.
 There is also a rubber insulator that goes into the lower plenum socket (not shown) where the injector seats that can be replaced, but I reused my old one. Audioquest likes to use a piece of 5/8" PVC pipe with a notch cut out for the connector, to tap the injector back into the fuel rail with a rubber mallet. I twisted and pushed my injector back into place with a padded pair of pliers. Sometimes it is possible to press the injector back into place by tightening the half-moon cap over it. However, the screws are fairly easy to cross-thread and strip, so don't force it. Having done the job in both freezing and warm weather, the injectors slide in and out easier in a warm garage. Good luck.
|


 How to Replace Fuel Injector Using Dremel Method -
  18:42:37 12/05/05