
Here is a view of the driver side bank of the engine block/head mounting surface. Showing the locations of restricors and oil jets.

Here is the passenger side.


Tools used for Oil jets and restrictors removal.
-Tap handle
-M5x.08 metric starter tap
-M4x.07 metric starter tap
-M5x.08 SHCS (socket head cap screw and washer)
-M4x.07 SHCS (socket head cap screw and washer)
-4mm allen key
-3mm allen key
-#30 size drill bit.
-Misc spacers (you'll see what I used them for) Just make sure the spacer is BIGGER than the object being removed!!)
-Micrometer is only there for reference of sizes (15mm is on the reading)
Also.. I chose Allen keys to do this because you can really feel and fine tune the amount of torque you are putting on the bolts. I dont recommend using a wrench or socket.. the chance is too large that you can just snap the bolt off.
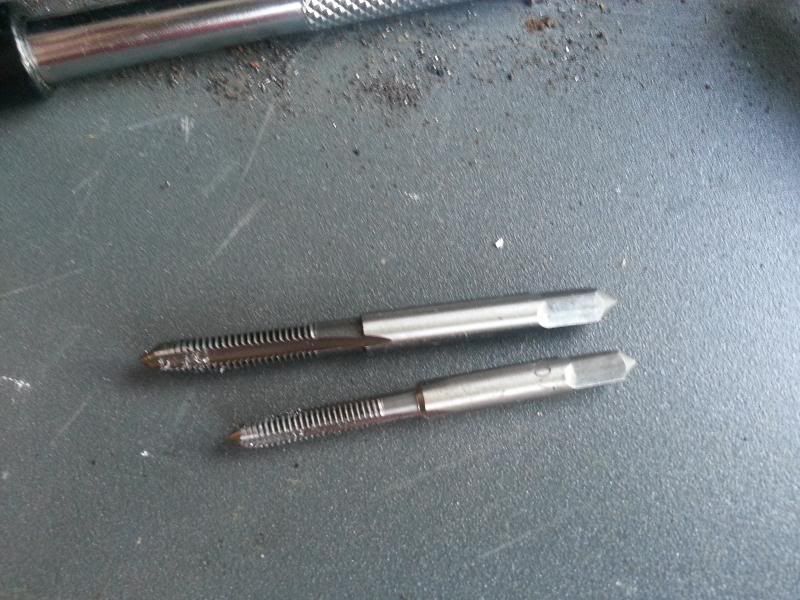
Metric taps I used.
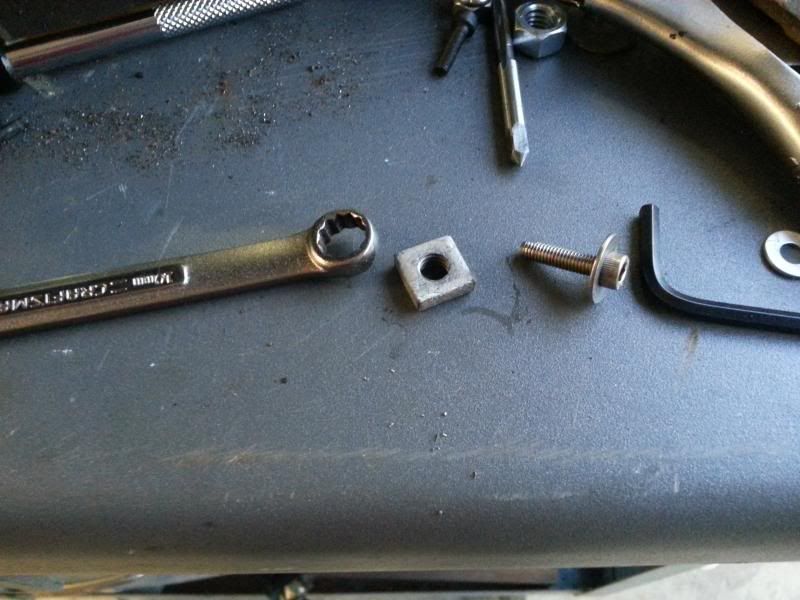
Spacers etc that I had laid out so you can see what I used/did.

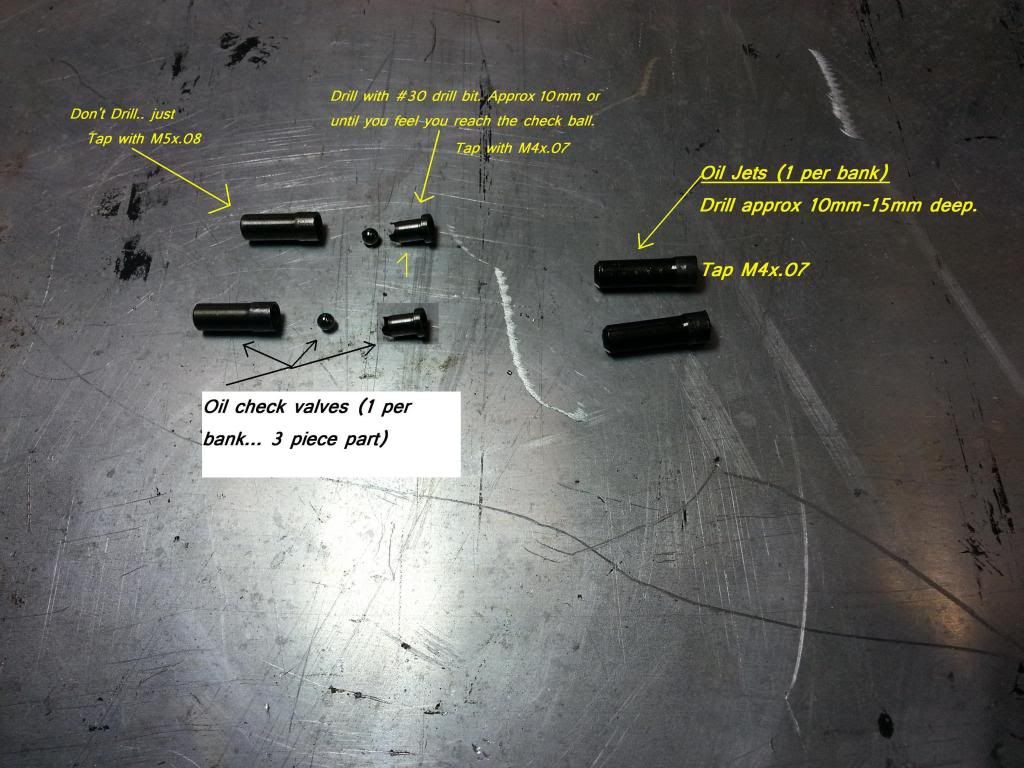
Start off by drilling the center of the Oil check valve with the #30 sized drill bit. Use some type of lube.. I just used some PB blaster I had sitting there. Drill approx 10mm deep or until you feel it the bit hit a hard spot and it will not go any further (the hardened check ball) Drill its perpendicular to the surface! I used a regular old electric hand drill.

Lube again before tapping.. make sure you blow out any metal shavings as well.

Grab the M4x.07 tap and begin to tap the #30 sized hole you just made. Press at bit at the beginning until it catches. Verify that the tap is going is straight.

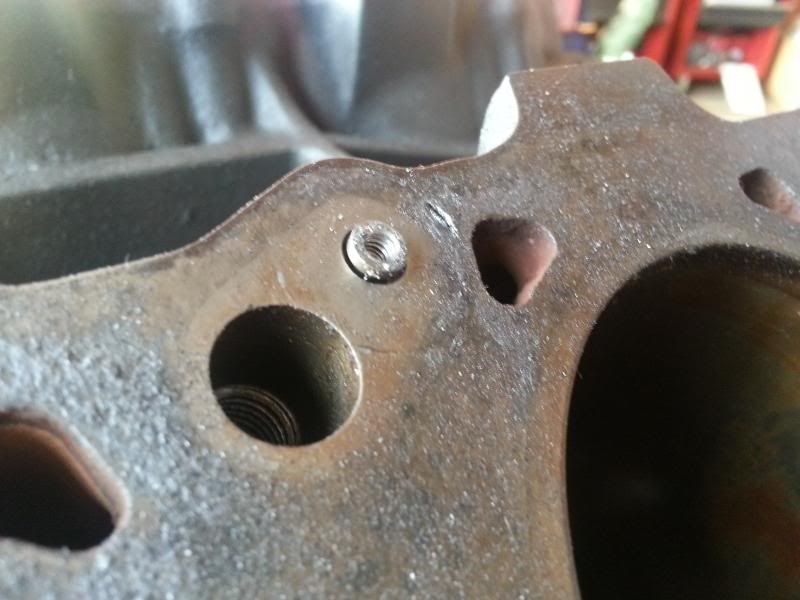
Tapped upper part of check valve.

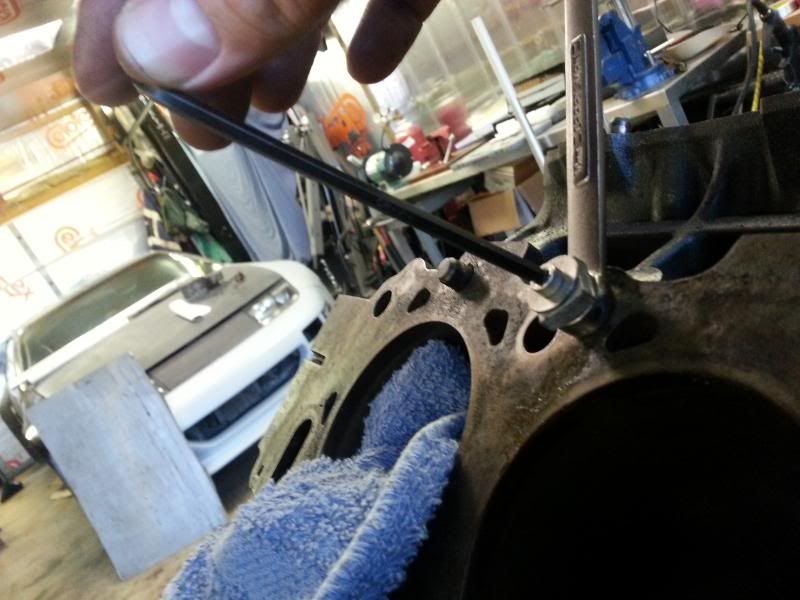
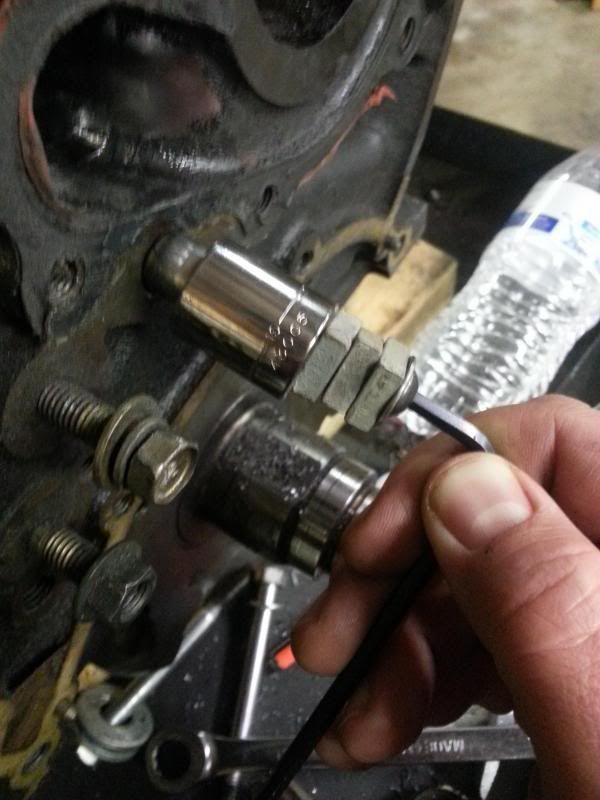
Stack the spacers up to get the desired height of bolt head to PULL the check valve out when you tighten the bolt head. Make sure you get a good amount of threads. Remove/add spacers as needed while doing this procedure.
The top part of the check valve is almost out. It is a 3 piece assembly when you remove them.

Top part of check valve is removed. Now the check ball and lower part is left in block still.

No need to drill.. because fortunately, the size of the lower part of check valve is perfect for the M5x.08 tap that you will use!

Tapped lower part of check valve. (Ball is still in the lower assembly.. just tap until you cannot go any further.. dont force it!)

Same procedure as the other part.

Removed lower part of the check valve assembly. The check ball is inside the cylinder.


Upper part of check valve assembly

Upper and lower check valve assembly (ball is inside lower assembly)
+++++++++++++++++++++++++++++++++++++++++++++++++++++++++++++++++++++++++++++++++++++++++++++
Here is how to remove the Oil Jets in the engine block/head mating surface.
Same tools used as removing the Oil restrictors
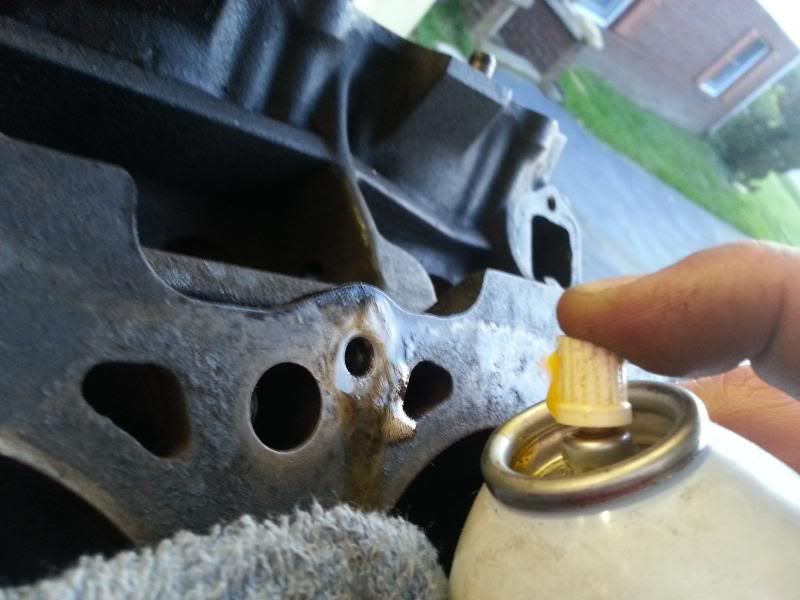
Lube Oil Jet (yes I know this is not a picture of the jet.. I am just giving step by steps)

Center the #30 drill bit in orfice hole of Oil jet.. You can grill this all the way through. Appox. 20mm
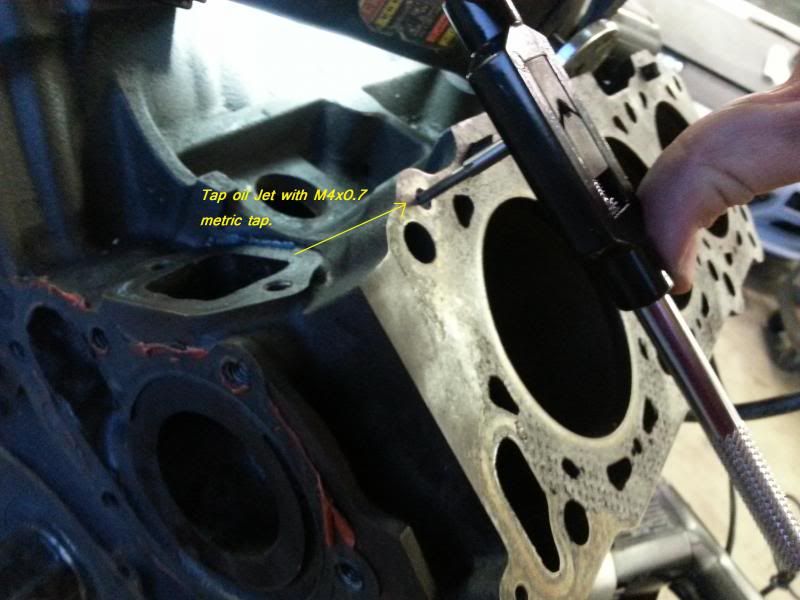
Use the M4x.07 tap to thread the oil jet.

Tapped Oil jet.

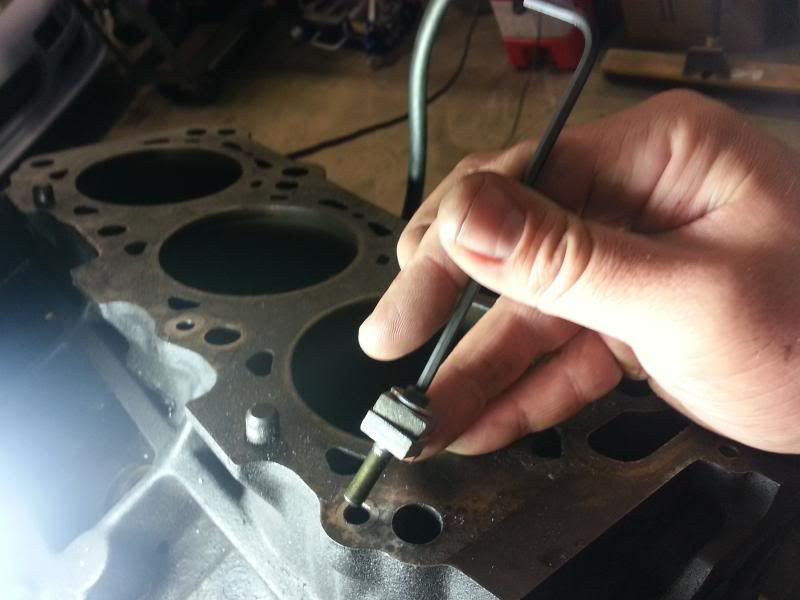
Use the same procedure as you did on the oil restrictors above. Use the M4x.07 SHCS bolt with allen key. Again, take your time and be carful.
Oil Jet removed. Repeat this procedure to the other bank of the block.
Good referencing of the Oil jets and restrictors.
++++++++++++++++++++++++++++++++++++++++++++++++++++++++++++++++++++++++++++++++++++++++++++++++++
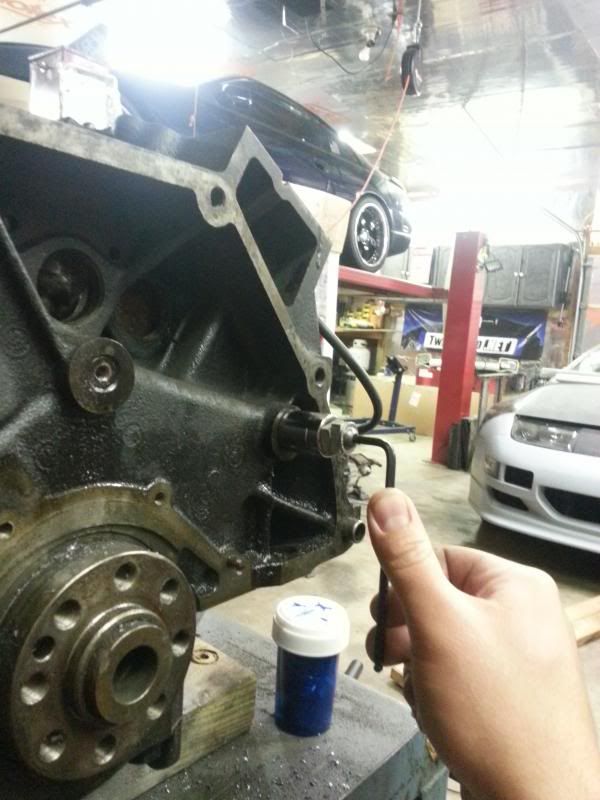
Here is how I removed the pressed in factory oil galley plugs.
I used a STD thread/pitch bolt. I could have used metric but did not have any laying around. the size I would need.
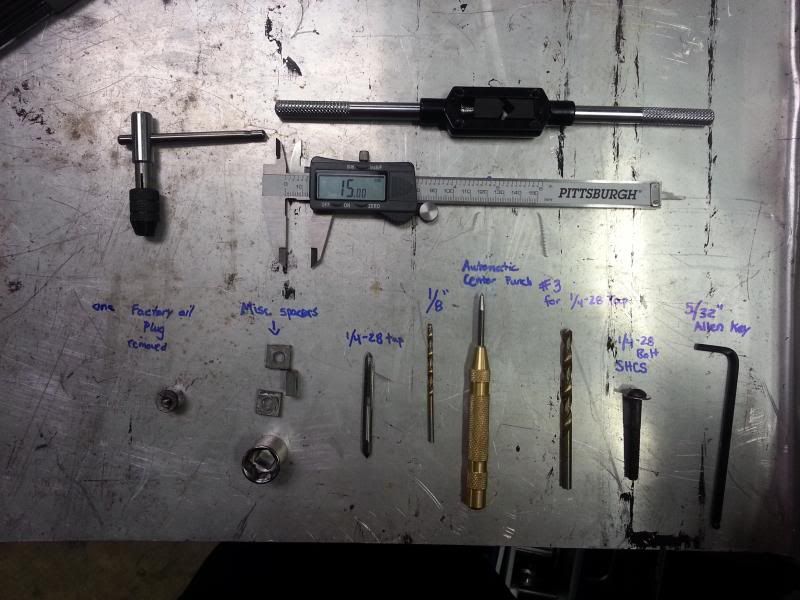
Tools I used are...
-Tap handle
-90* tap handle to tap hole near crank snout if crank is still on engine.
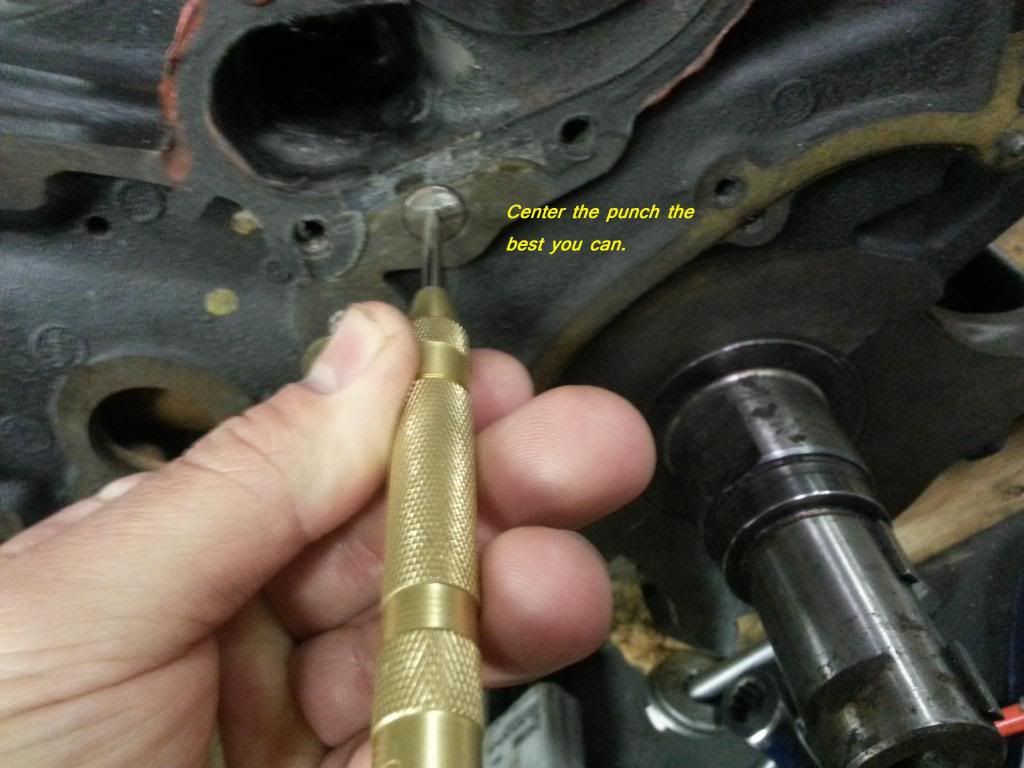
-Automatic center punch
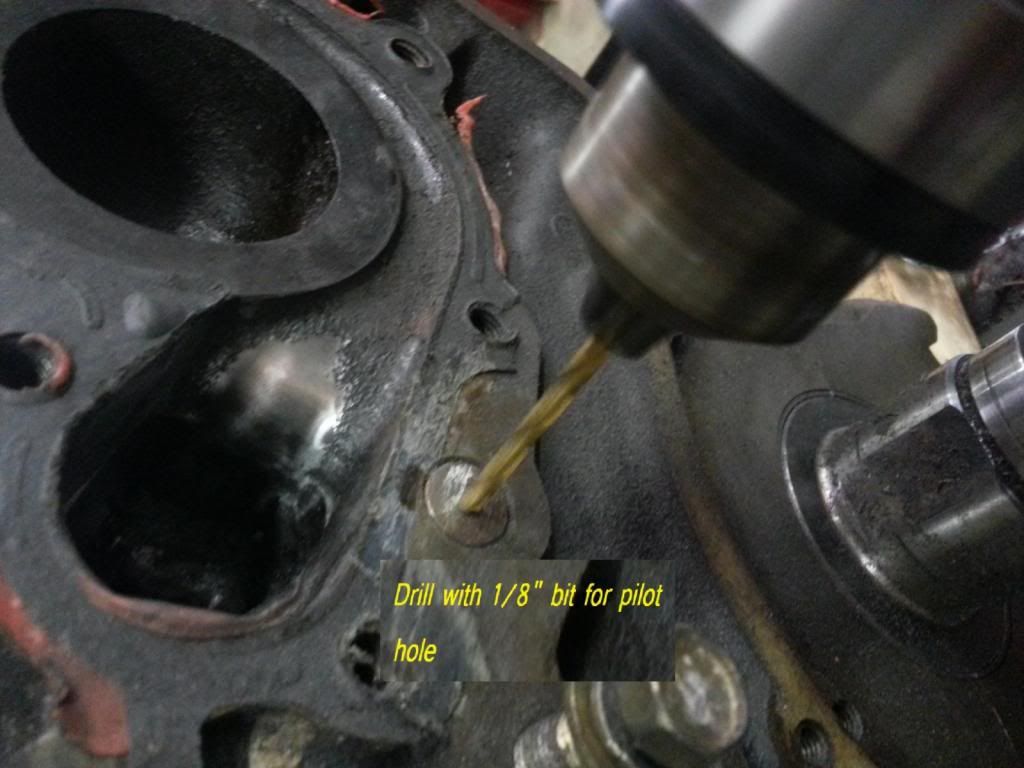
-1/8" drill bit
-#3 size drill bit for tap 1/4-28 bolt
-1/4-28 STD starter tap
-5/32" allen key
-1/4-28 SHCS bolt (the one pictured is a button head. USE A SHCS instead!)
-Misc spacers.
-Micrometer is for size reference (its at 15mm)


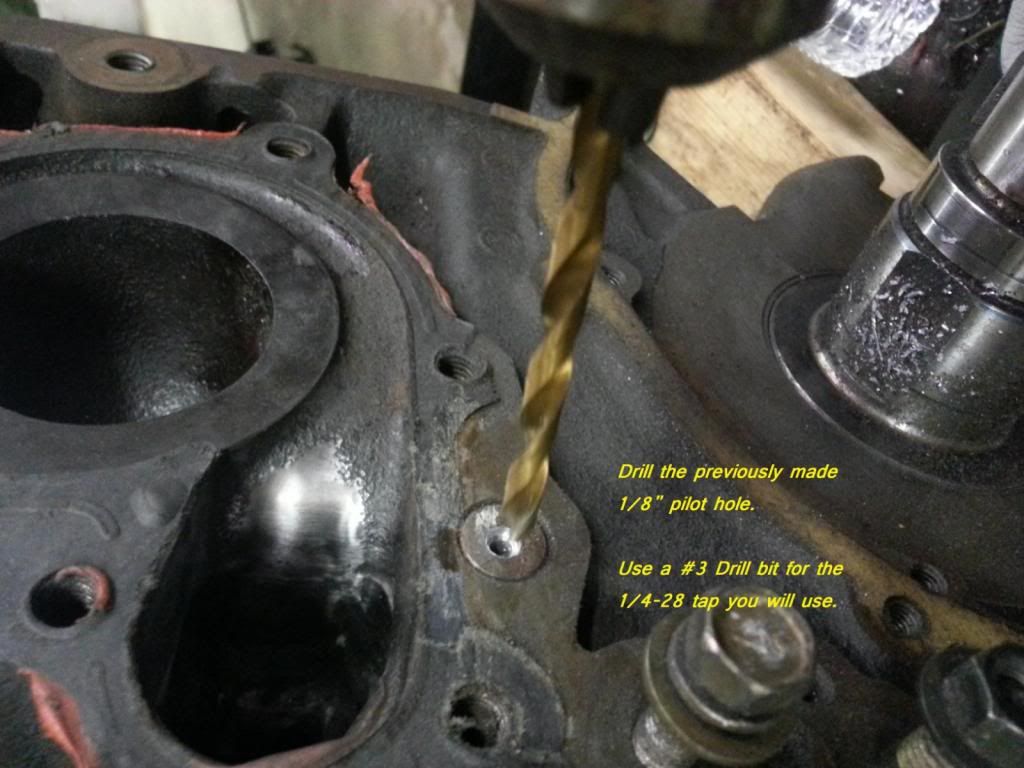
Stepping up to #3 sized drill bit to drill out 1/8" pilot hole so I can use 1/4-28 tap

Lube and begin to tap the plug.


First plug being removed. Now repeat on the other 2 on the back of the engine block.

Two plugs on back of engine block

3 plugs removed.

Check out that debris in the center of block! Imagine after machinging.. if these weren't removed.. the shavings would destroy your rod/main bearings and possibly turbos too! Use compressed air and carb cleaner with long rifle bruses after machine worka and hot tanking is complete.
+++++++++++++++++++++++++++++++++++++++++++++++++++++++++++++++++++++++++++++++++++++++++++++
If you ever was curious how head locater pins are removed.. super simple.
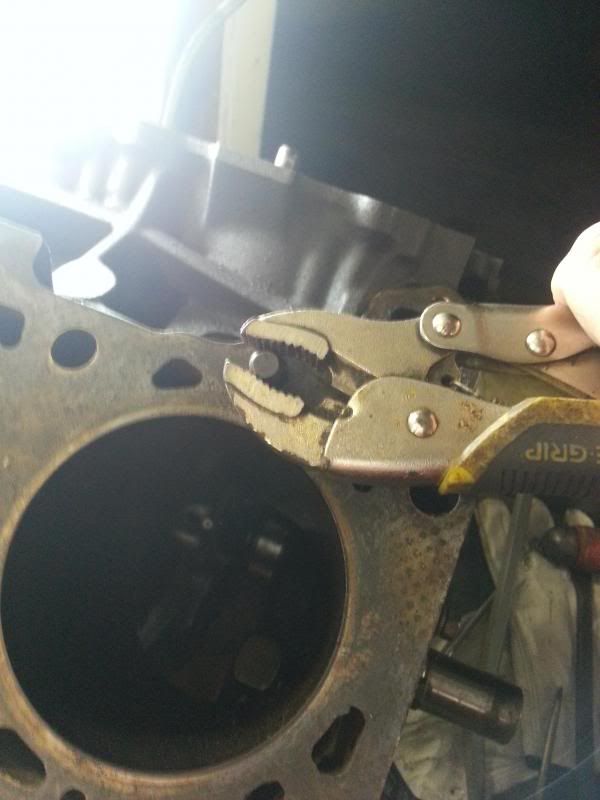
Vise grips.. clamp and turn/pull.

I will be making another post later on about how to replace them all..
Hope this may help someone with their project.. and a big thanks to Mike Smith about the tech questions!
~~~ Sig starts below
~~~NO, This picture is not photoshopped.
AIM:Shawn300zxTT
"-Any closeups on the nuts? - zboost(tx) 19:17:53
08/08/05
-Not really something you want to ask another man
about... (n/m) - LordZ 19:24:00 08/08/05"
"I just took 45 min and scrubbed the heck out of my rear"
teambushido(San Diego, CA) 19:24:51 12/11/04
-1991 Stage _ TT 5spd (Upgraded to hell and back)
Custom widebody
-2000 Nissan Altima SE (Daily driver)
-1990 Midnight blue 2+2 NA 5spd. (conversion soon :)
-2001 Ford F-150 Crew cab, 5.4 Triton v8.. Tow bitch
-2004 Honda CBR 600RR (Candy blue, FOR SALE)
-1990 Cherry Red Pearl ,Auto Coupe (Parts car)
Gone..
-1990 Super White 2+2 Na Stage 3 Auto (Deceased :( )
-1990 11 Sec Eagle Talon Tsi AWD, (SOLD!)
-1997 Acura 2.2 CL, 5spd. Daily Driver.. (black ice victim
:(


 HOW TO: Remove Oil jets,Restrictors, and oil plugs in VG30 -