| Since there was interest in this project here is a ten-thousand-foot view of what we did to solve the various obstacles in making this happen. The donor part used was: 2020 NISSAN 370Z COUPE BRAKE BOOSTER MASTER CYLINDER SPORT
Step 1:
Remove the OEM brake master cylinder and booster. I’m sure there’s a good write up somewhere on this. Very straightforward.
Step 2:
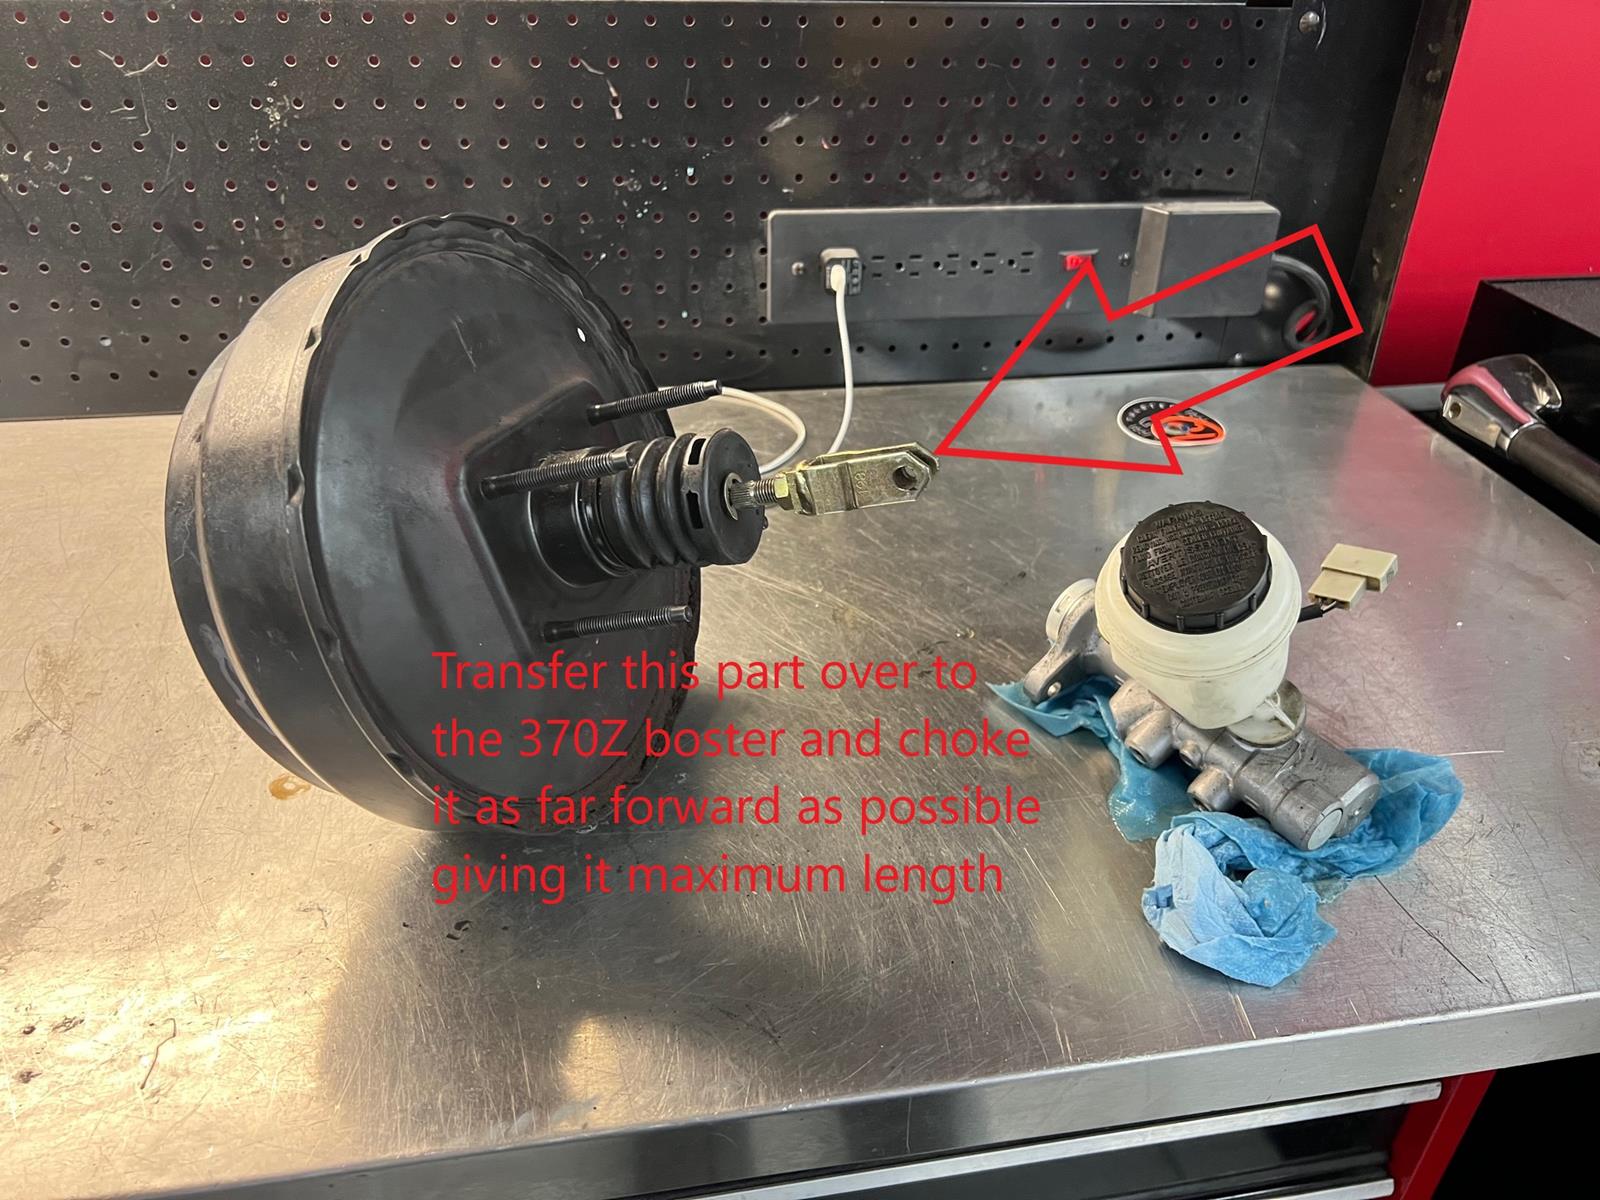
Transfer the brake pedal attachment over to the 370Z booster allowing for as much length as possible. The OEM 370Z part will be too short and make the pedal too low.
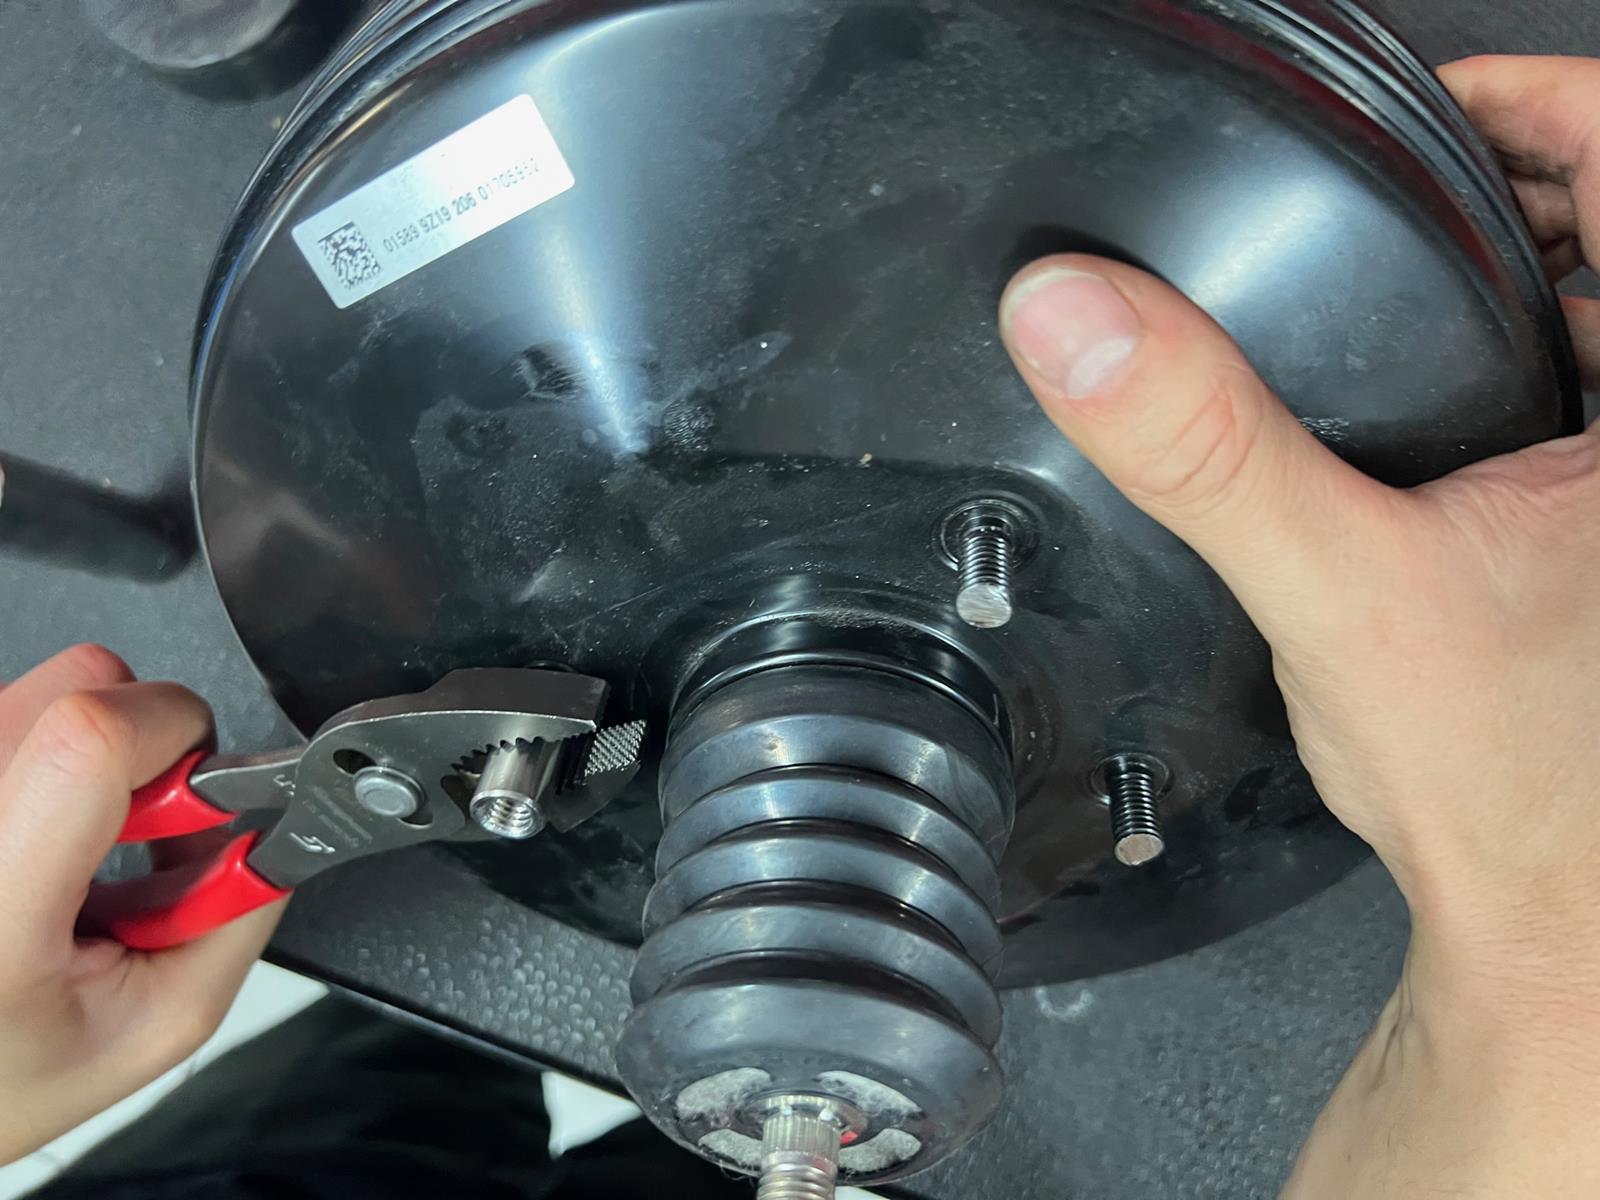
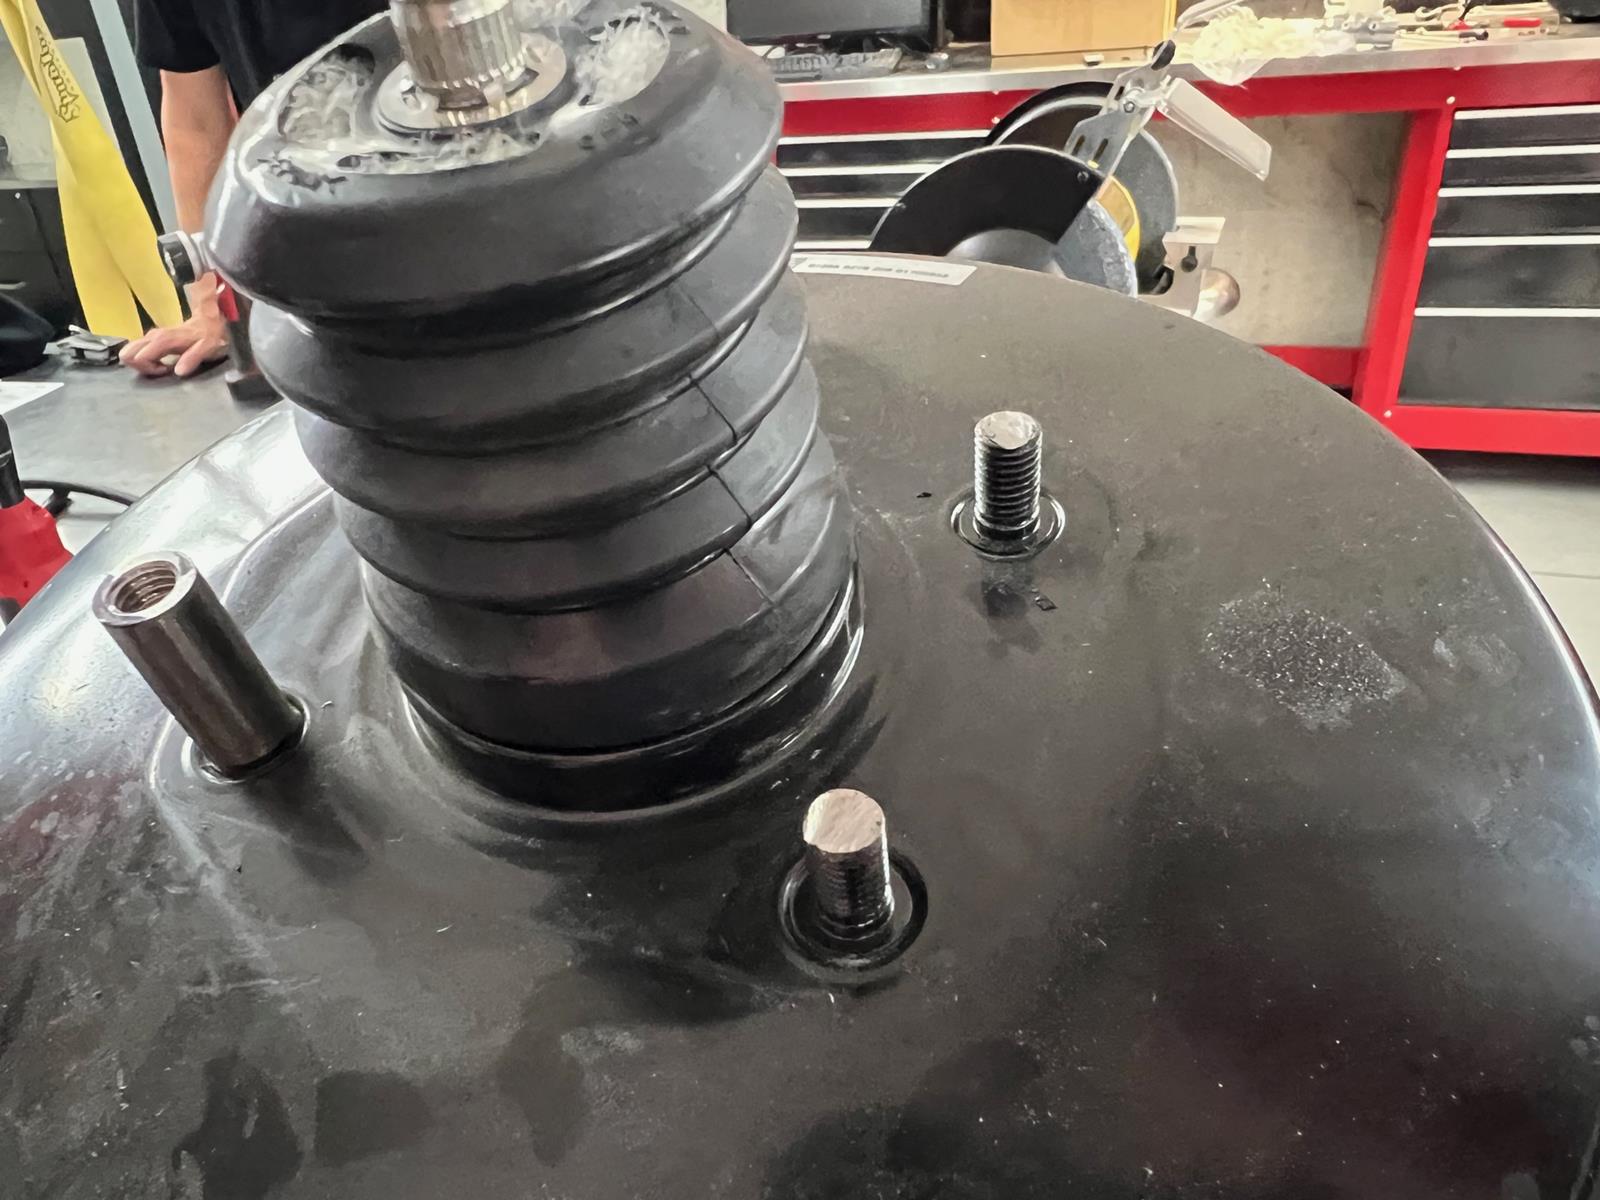
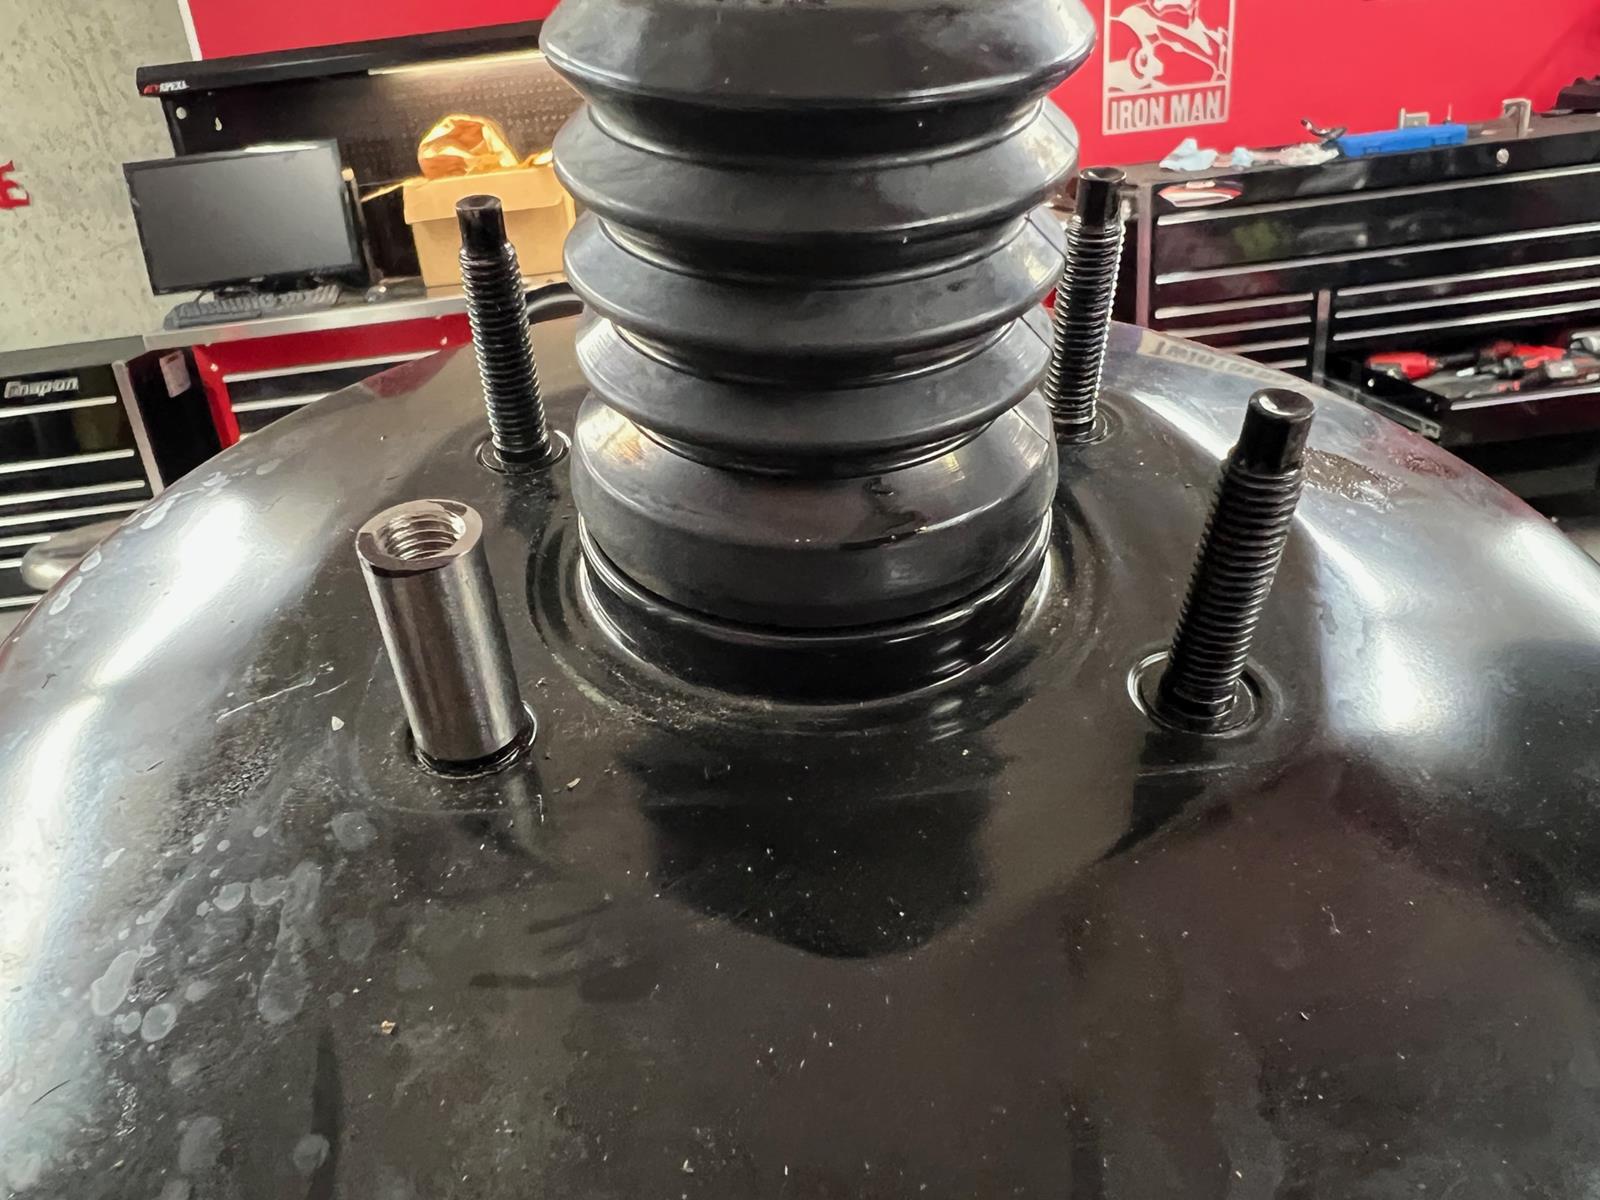
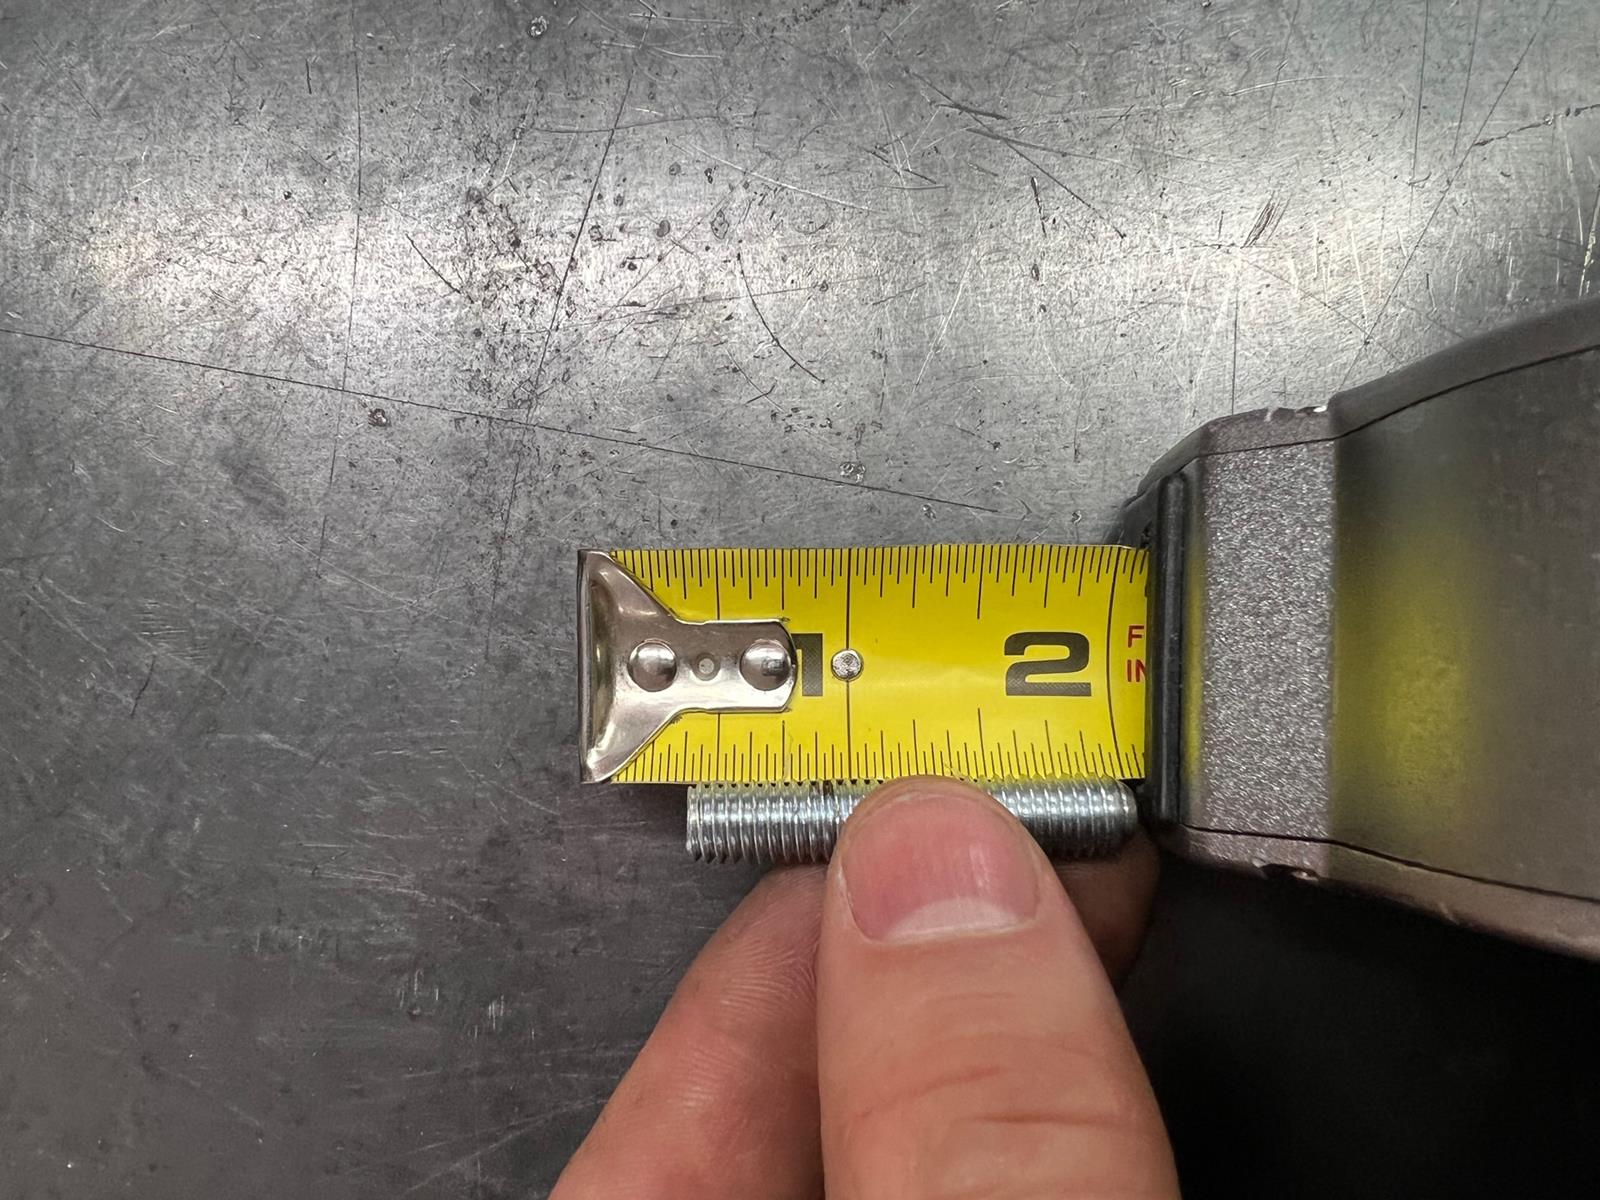
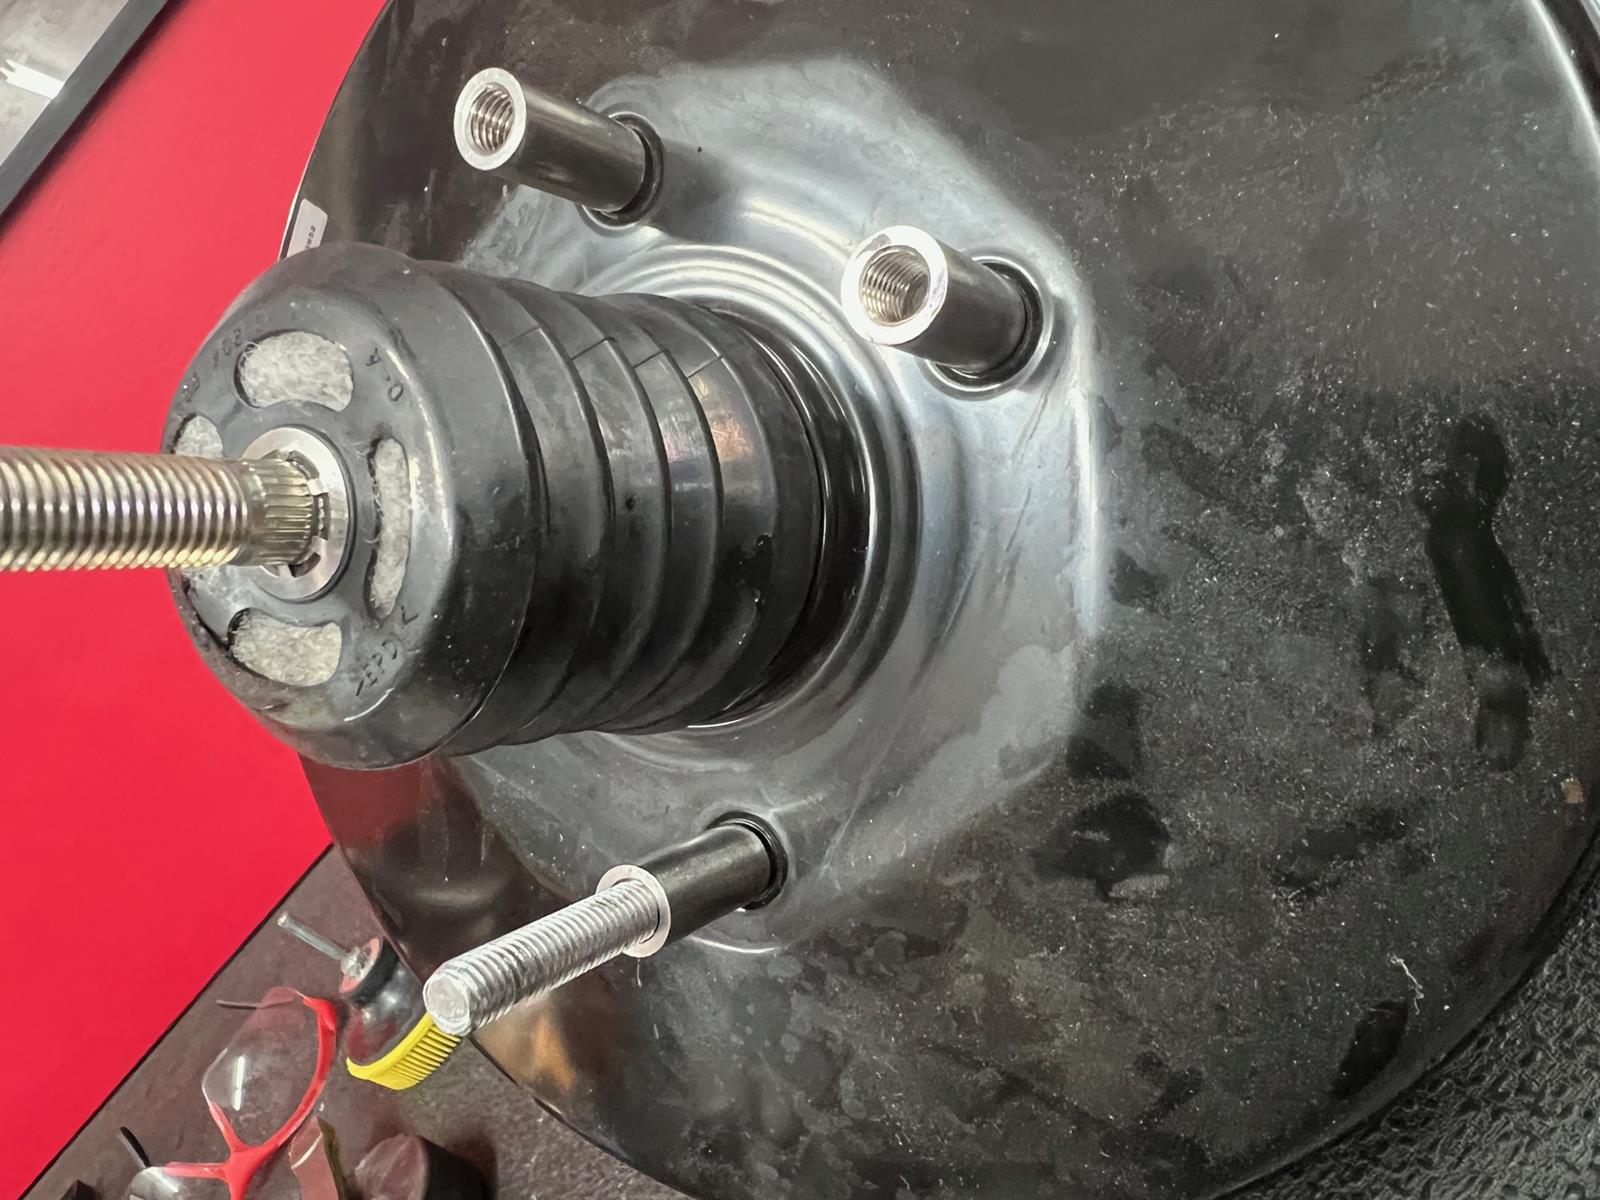
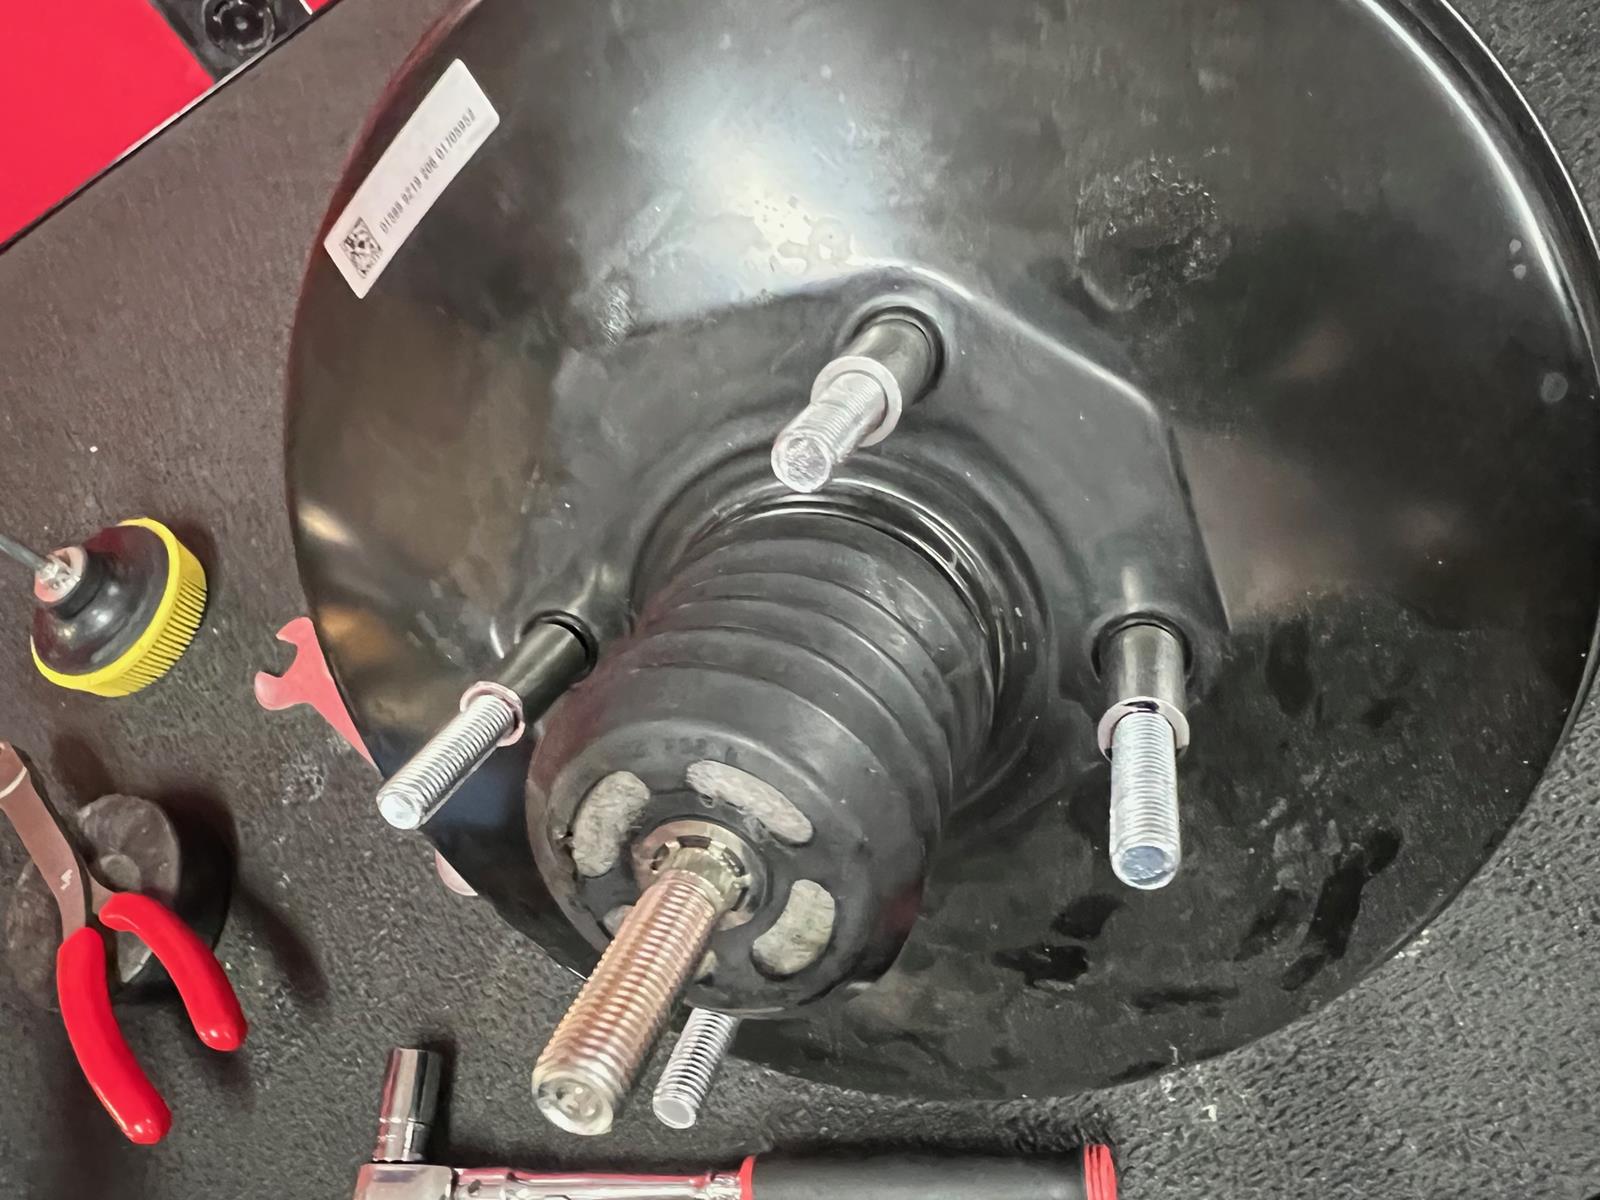
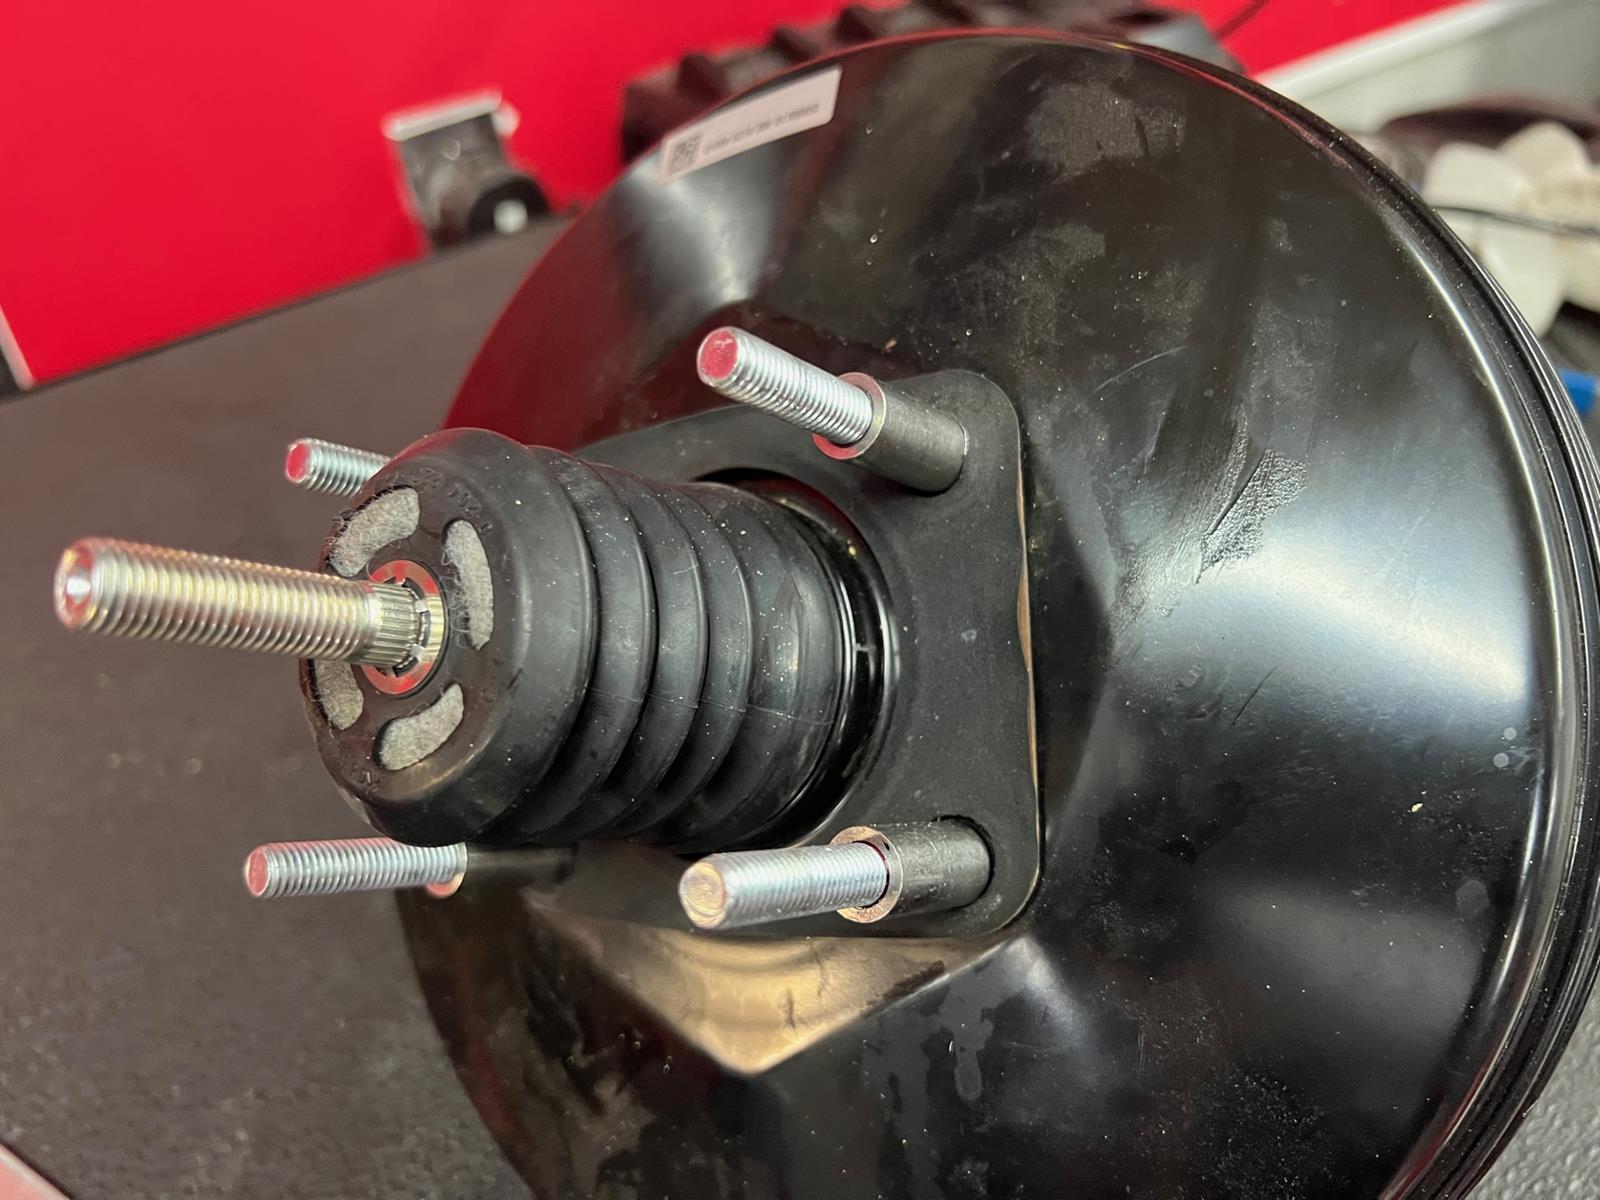
Step 3: The studs on the 370Z boosters are the exact same pattern as the Z32 but they are too short. I looked at welding studs on but didn’t see a clean way to open the booster up in order to get to them and ultimately just decided to add screw on extensions. You will need to cut the studs on the 370Z shorter then install the M8x1.25mm Threaded Sleeve Rod Bars over top of the stubs, ideal the studs will come about half way up into the sleeve. Put red thread locker on to them to secure in place. Threaded sleeve rods available here: https://www.amazon.com/dp/B01IVT9C64?psc=1&ref=ppx_yo2ov_dt_b_product_details Next you will need to make or buy M8x1.25 studs in order to screw them into the newly attached sleeves. Put red thread lock on these too and use the two-nut method to firmly screw them in the posts. You can see how long I cut them below....just make sure the total length on these is approximately the same total length as the OEM Z32 brake booster studs.
Step 4:
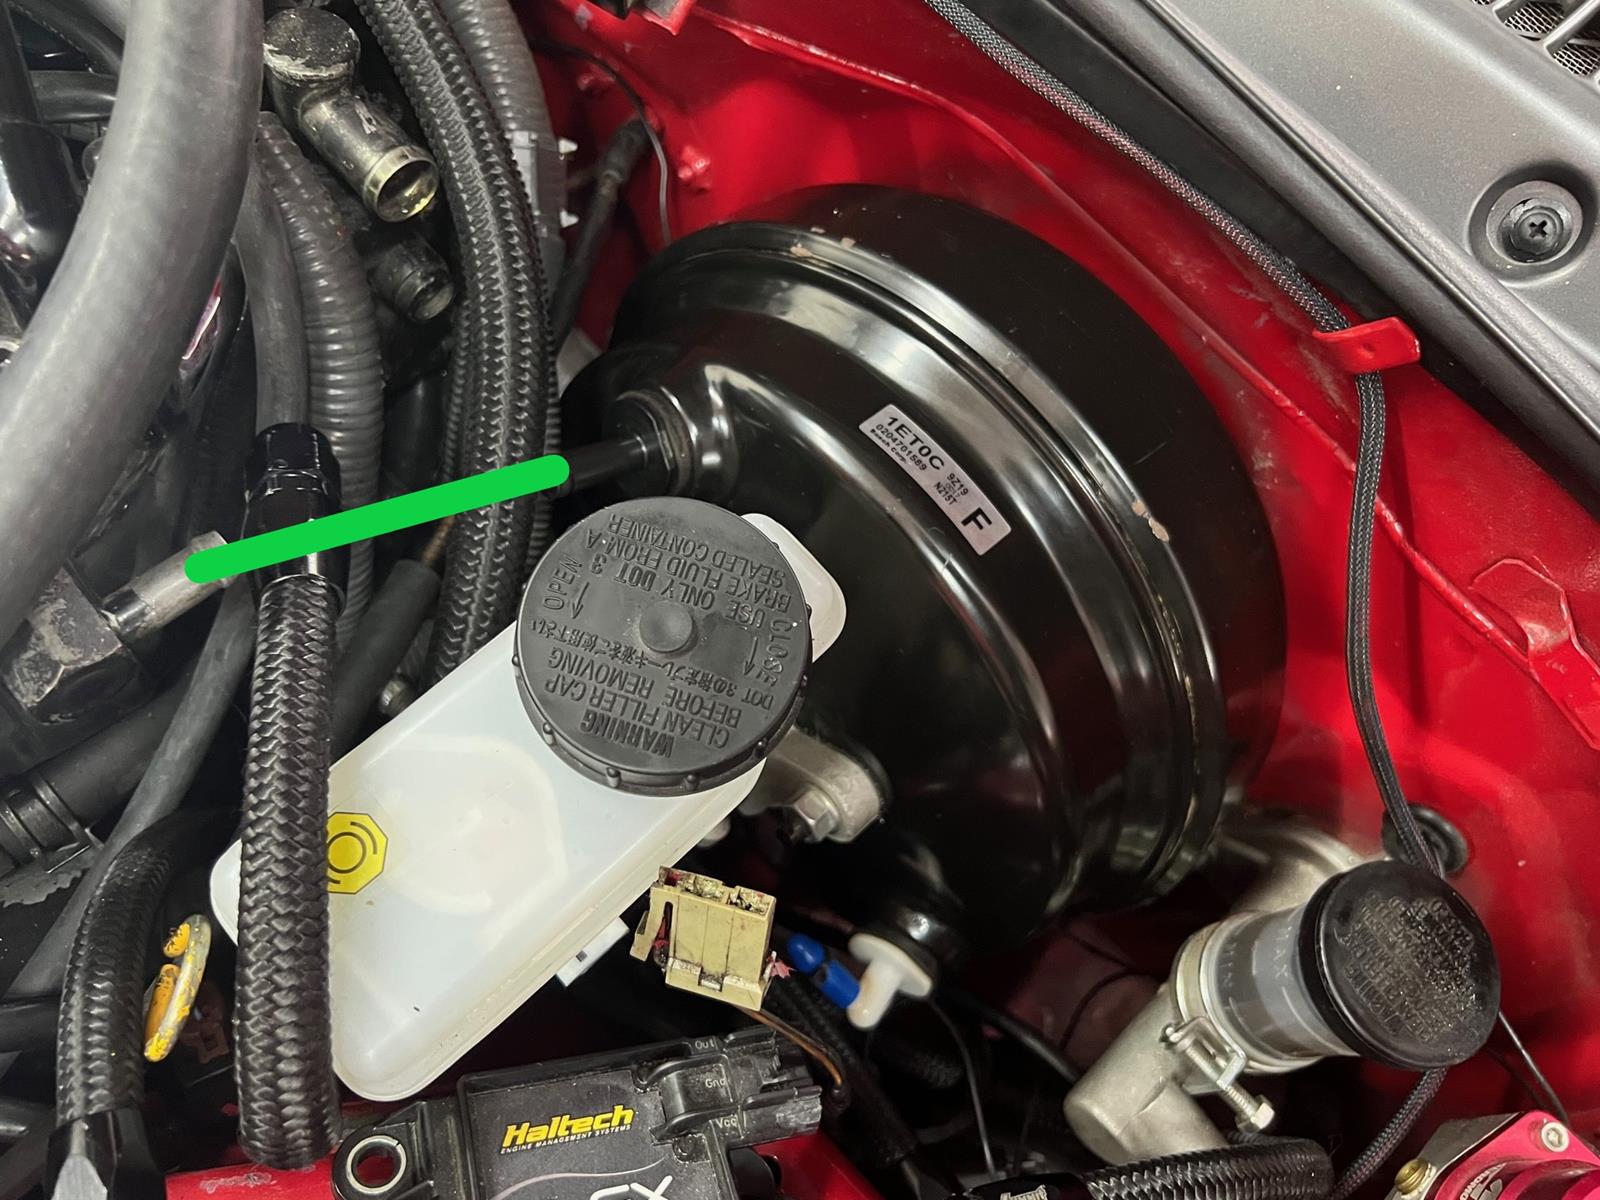
The 370Z Brake booster has two ports on it compared to the single port on the Z. The 2nd port is an additional OEM map sensor. You can leave this attached or cap it. You just don’t want it to leak. 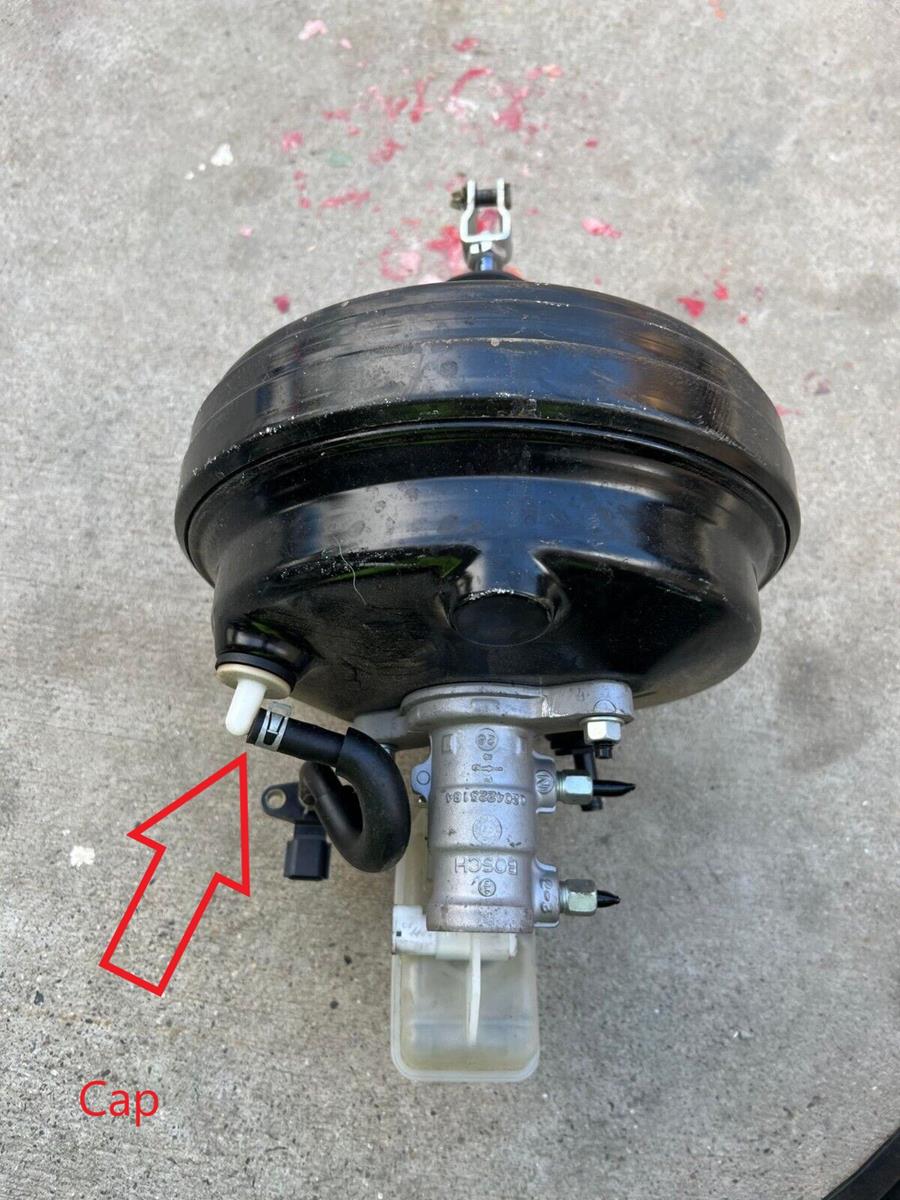
Step 5:
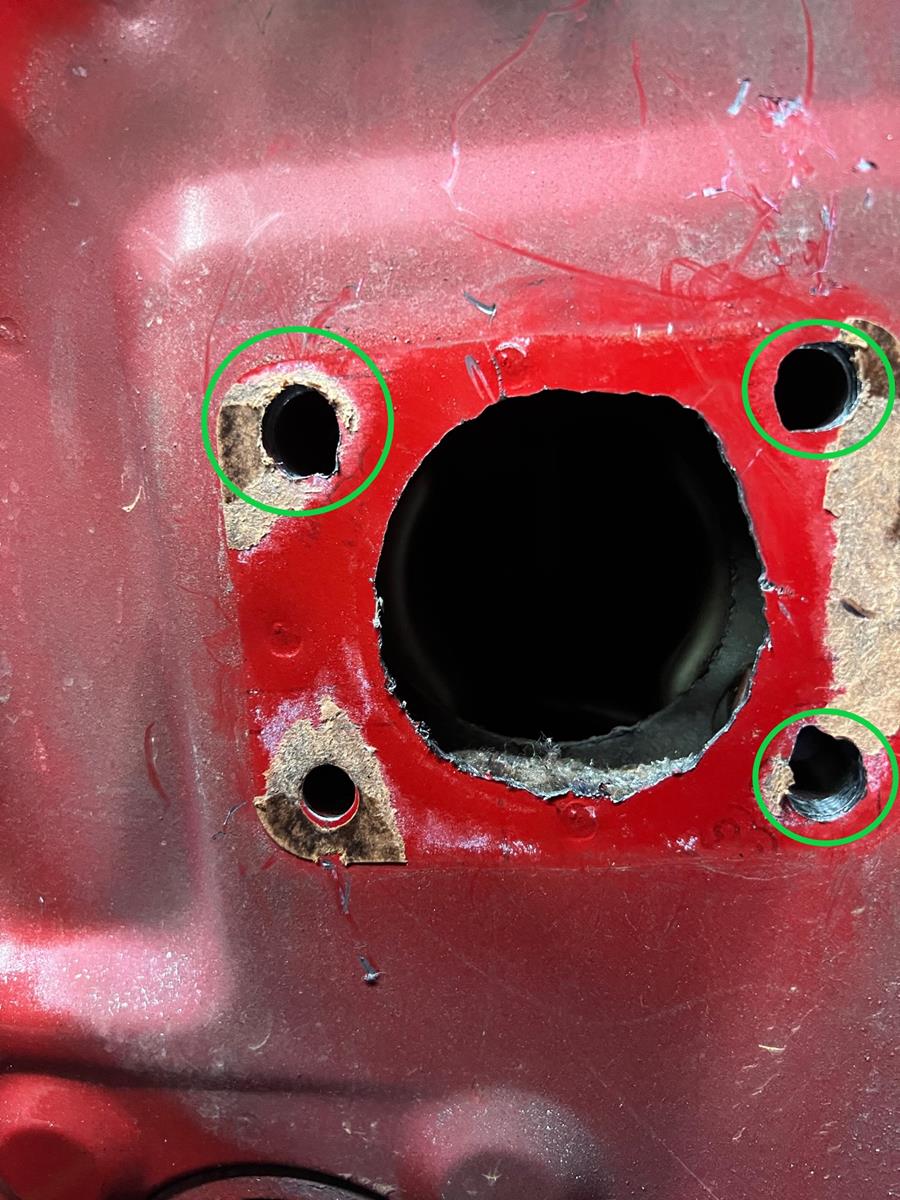
There are 5 holes in the Z32 firewall (4 studs and 1 for the center of the back of the brake booster) that allow for the brake booster to pass through and make its attachments…and they are now all too small and will need widened. The 4 holes that allow the studs to pass through are very straight forward to Dremel out and you can use some of the extra threaded sleeve rods as a gauge to see when they are wide enough to pass through. The good news with these holes is that there is a rod which is welded from the inside that makes process dummy proof. In doing this you aren’t weakening anything…its just extra meat that was covering hole.
The Green circles around 3 of 4 stud holes have already been widened. The bottom left hasn’t. You can see how little material actually needs removed. The larger center hole doesn’t need to be widened much at all in order accommodate the slightly larger diameter on the back of the 370Z boosters. Also, I went back and used a Shank Mounted Flap Wheel after this picture was taken and got everything smoothed out much prettier. And if you ever wanted to go back to an OEM brake booster / master it would still bolt right up…so this isn’t a commitment to stay with the 370Z setup.
Step 6:
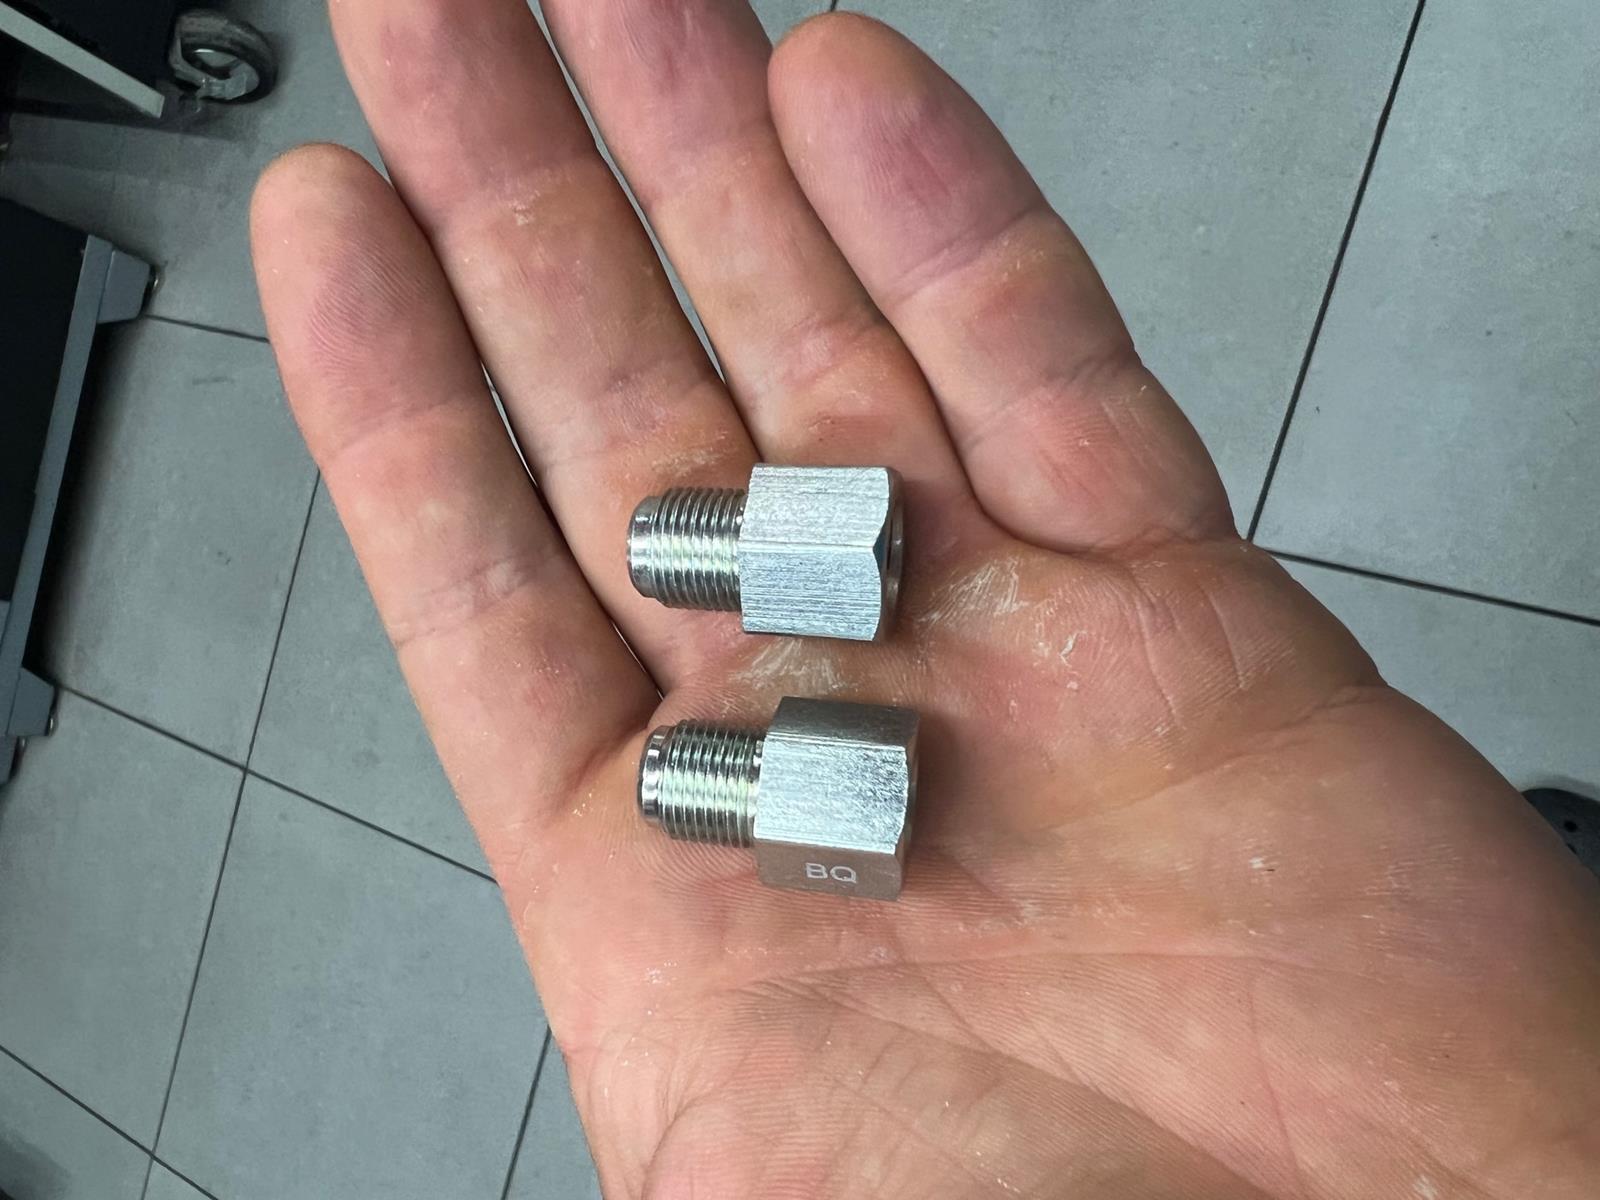
The OEM Z32 brake master has different size attachments than the 370Z brake master. I spent HOURS trying to find this adapter. The Z32 has a 10mm x 1.0 inverted port and the 370Z has a 12mm x 1.0 inverted port.
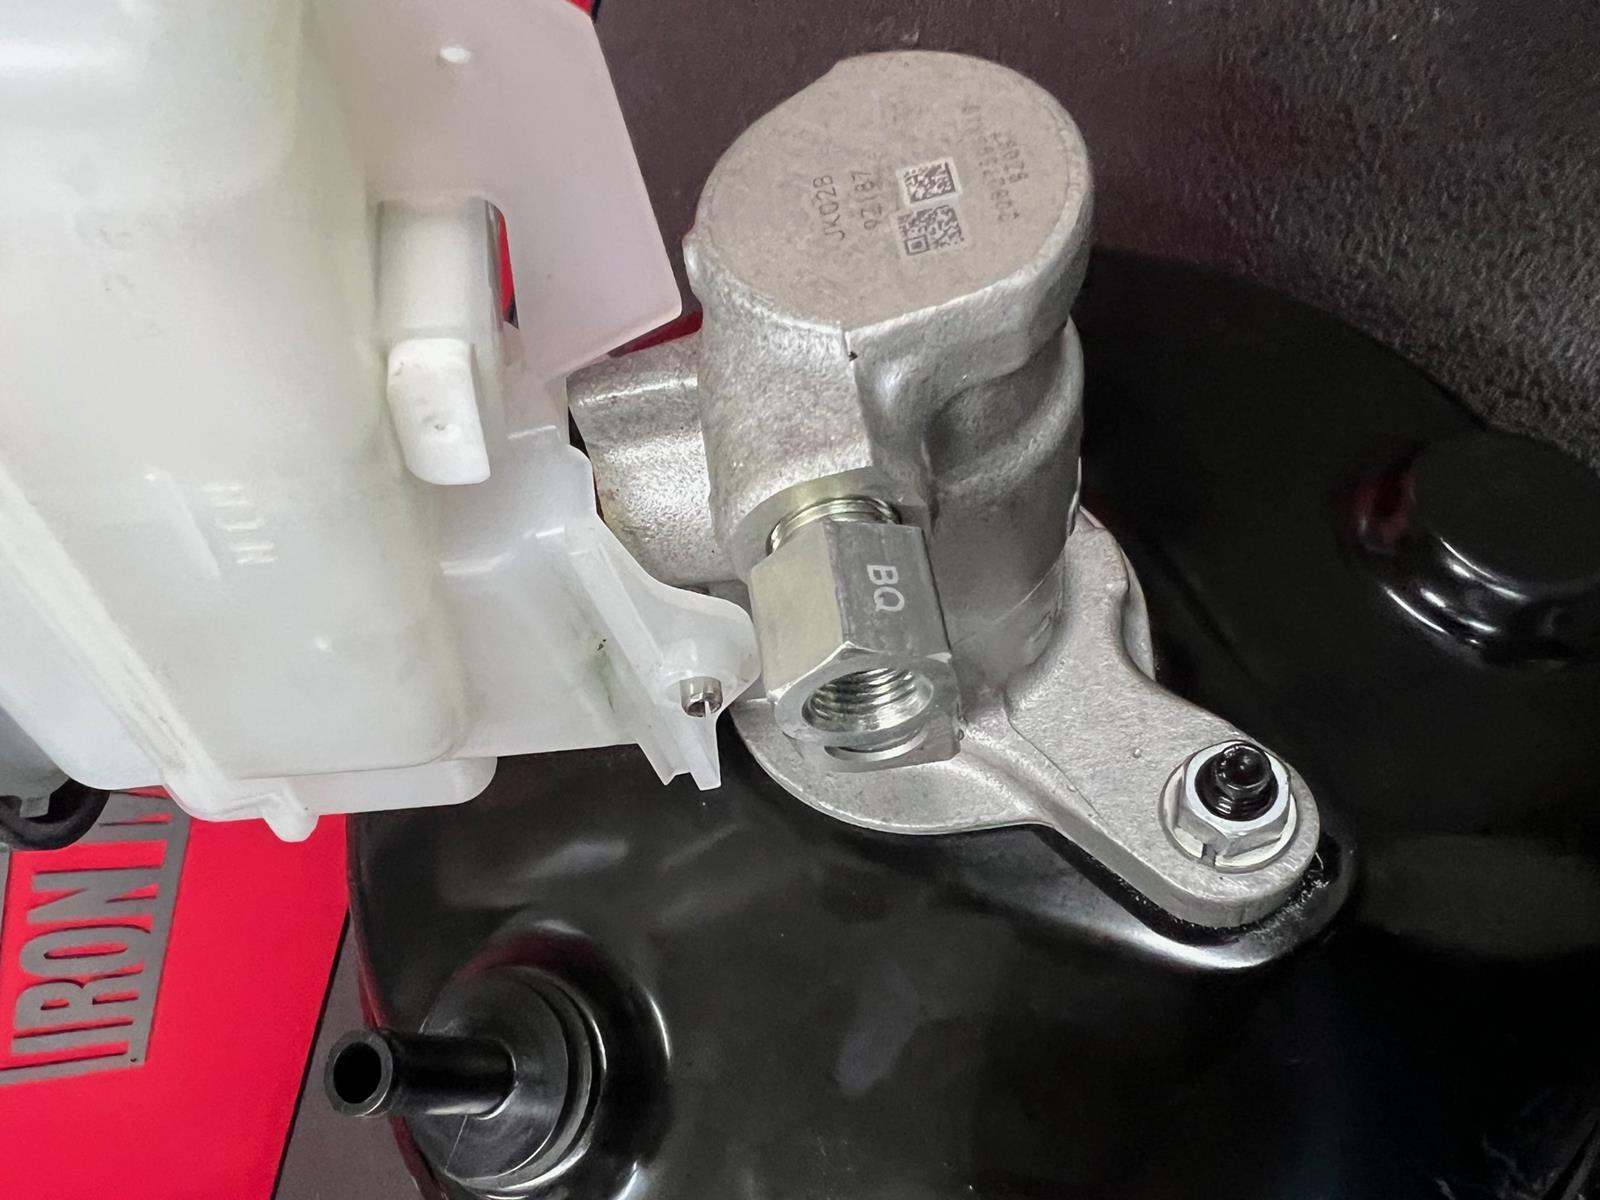
So, with this adapter it’s a plug and play. (I bought from ebay member Vintage Imports Inc)
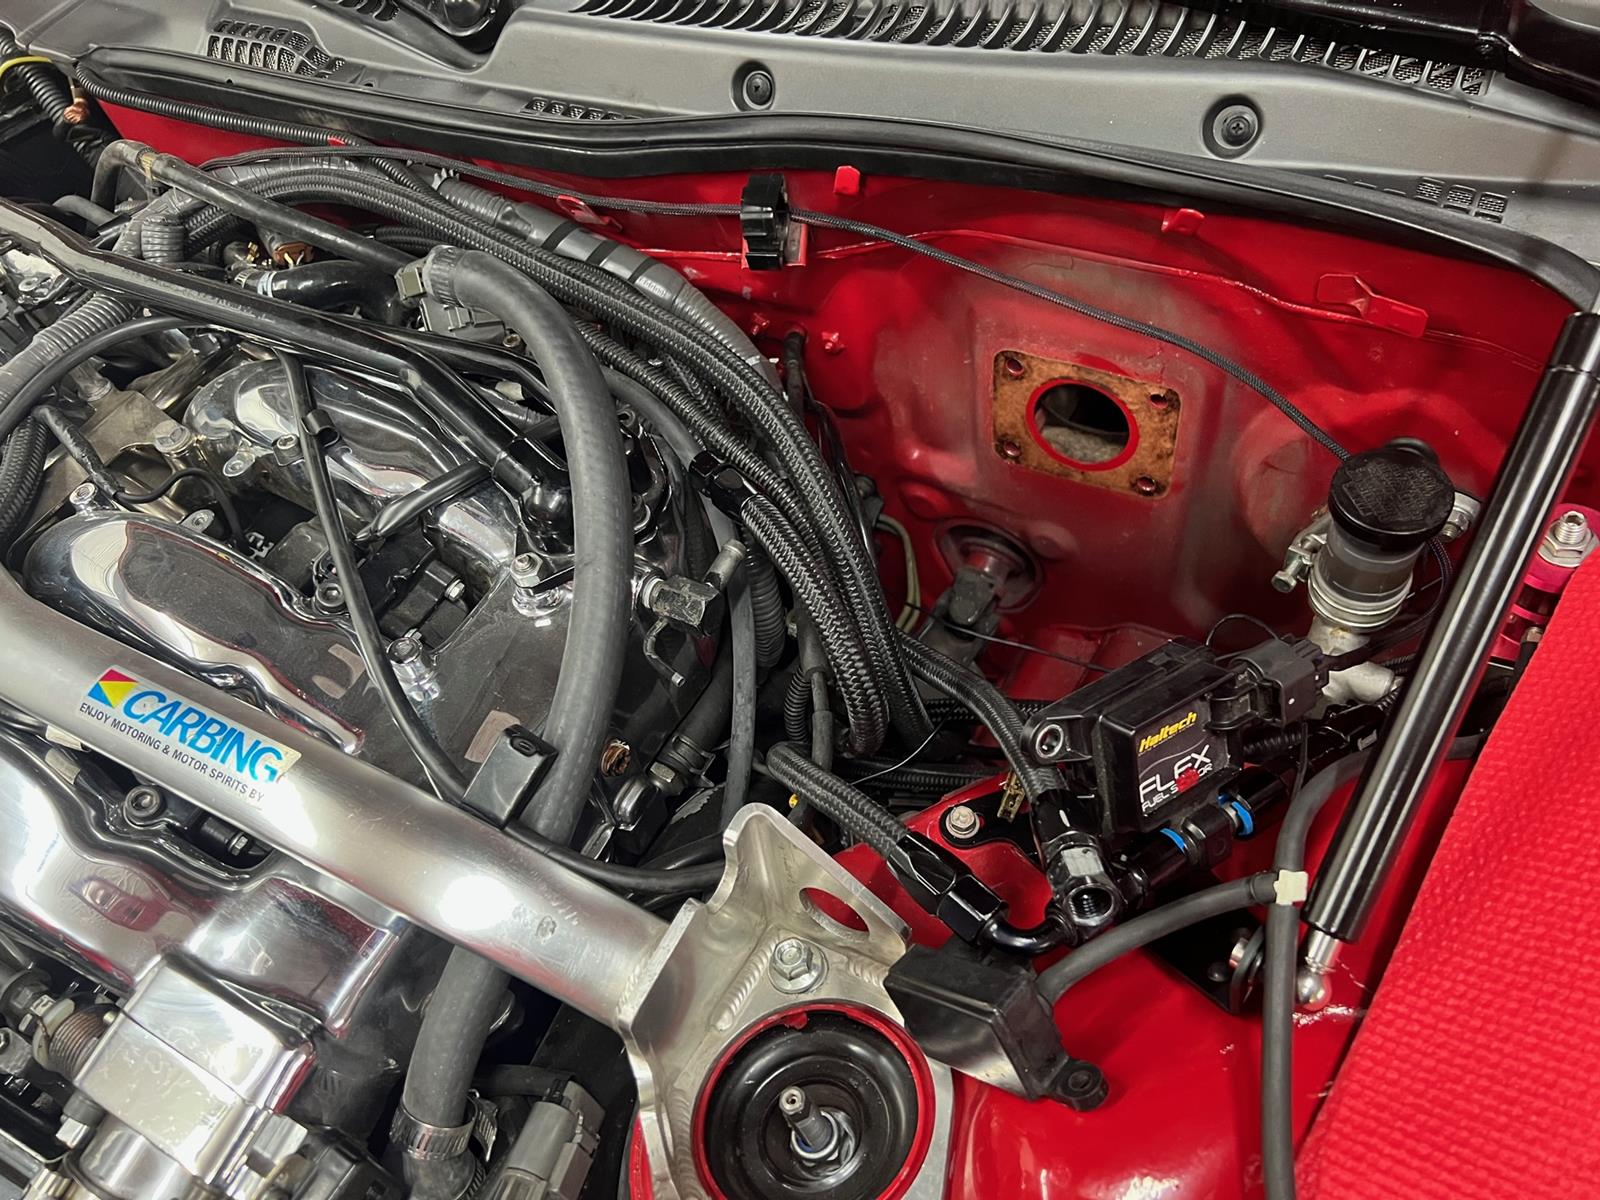
The OEM Z32 brake lines are very close to a perfect fit from an angle stand point, I just had to slightly clock the one closest to firewall in order to get it to fit. It bent very easily and took almost no force. You will want to bend this line prior to putting the new brake booster in…just easier to get to that way. 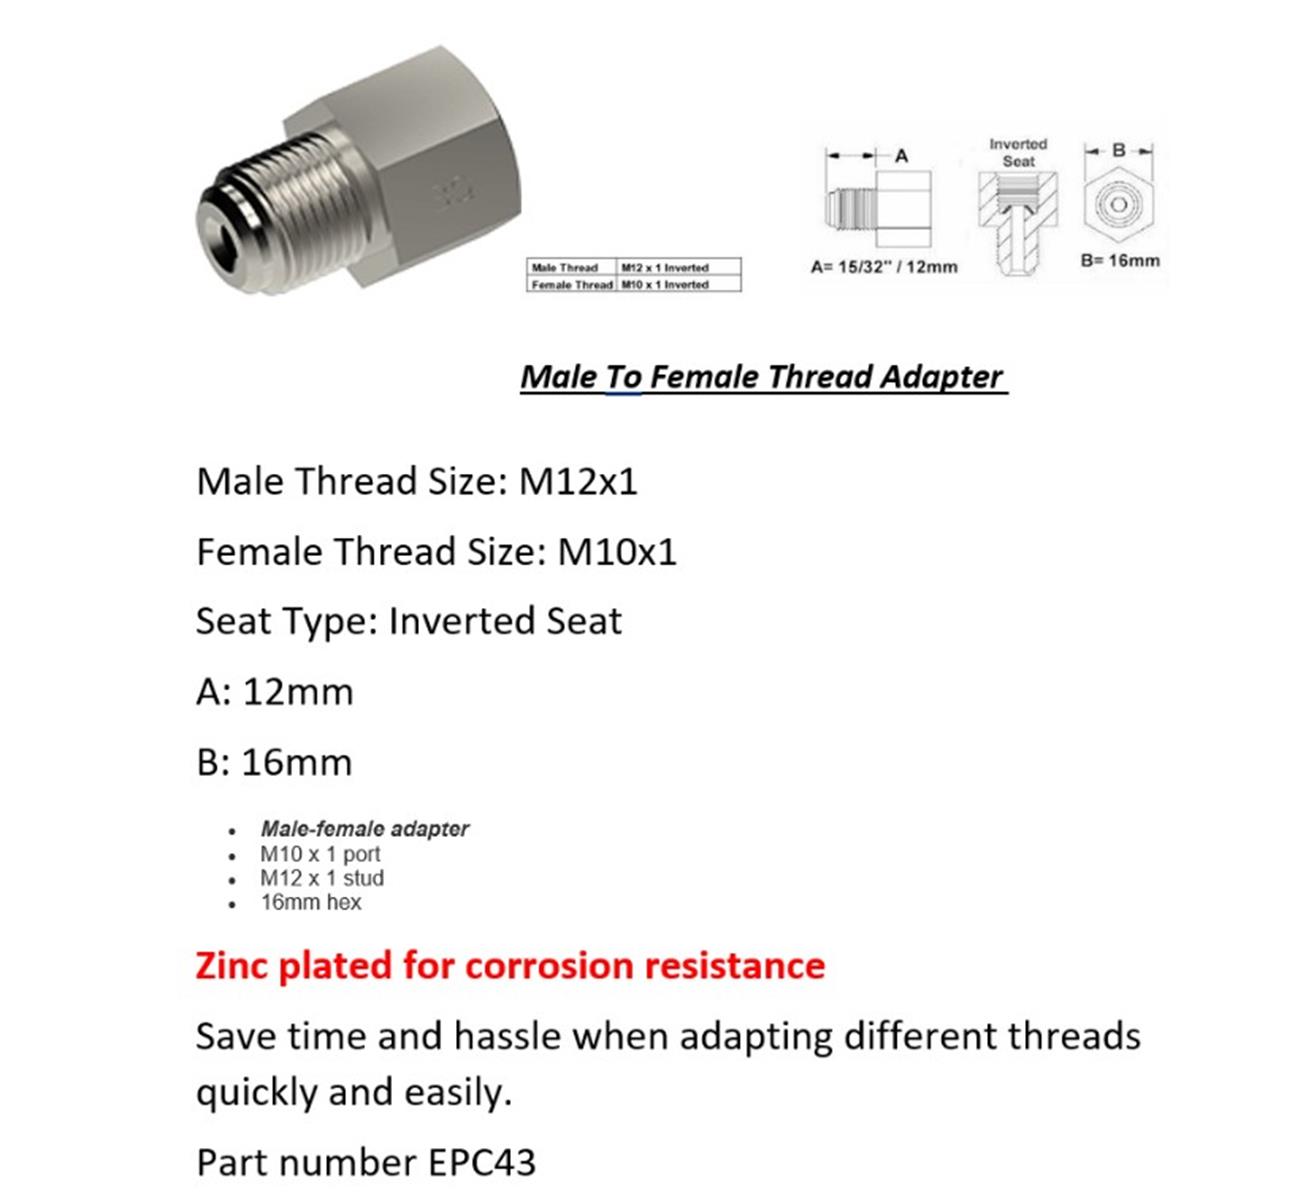
Step 7:
You are now good to install the assembly just like you would the OEM part… I was able to do it with the brake master cylinder attached to the booster with no issues. I am not sure if this part is correct or not but I didn’t even bleed the system after all of this. I put fluid into the top of the 370Z revisor until both ports started to leak and then hooked the lines back up. Drove great. I am not recommending this just stating what I did. This pedal assemble was just a touch shorter than the Z32 one and my brake lights stayed on until I adjusted the sensor out a little bit…very simple to do and may not be necessary on yours pending where you had the oem pedal set.
Step 8:
The brake booster line for the Z32 will fit with a weird clock to it. I just trimmed my Z1 silicone hose and put the Z32 check valve in line. Make sure its oriented the correct way same as it was on your Z. The 370Z booster without the Z32 check valve installed will not be happy…don’t forget this step.
Step 9:
I haven’t done this yet but the brake fluid sensor on the 370 is a different style than that Z32..still a two wire I just need to get a pig tail and connect the wires.
Step 10:
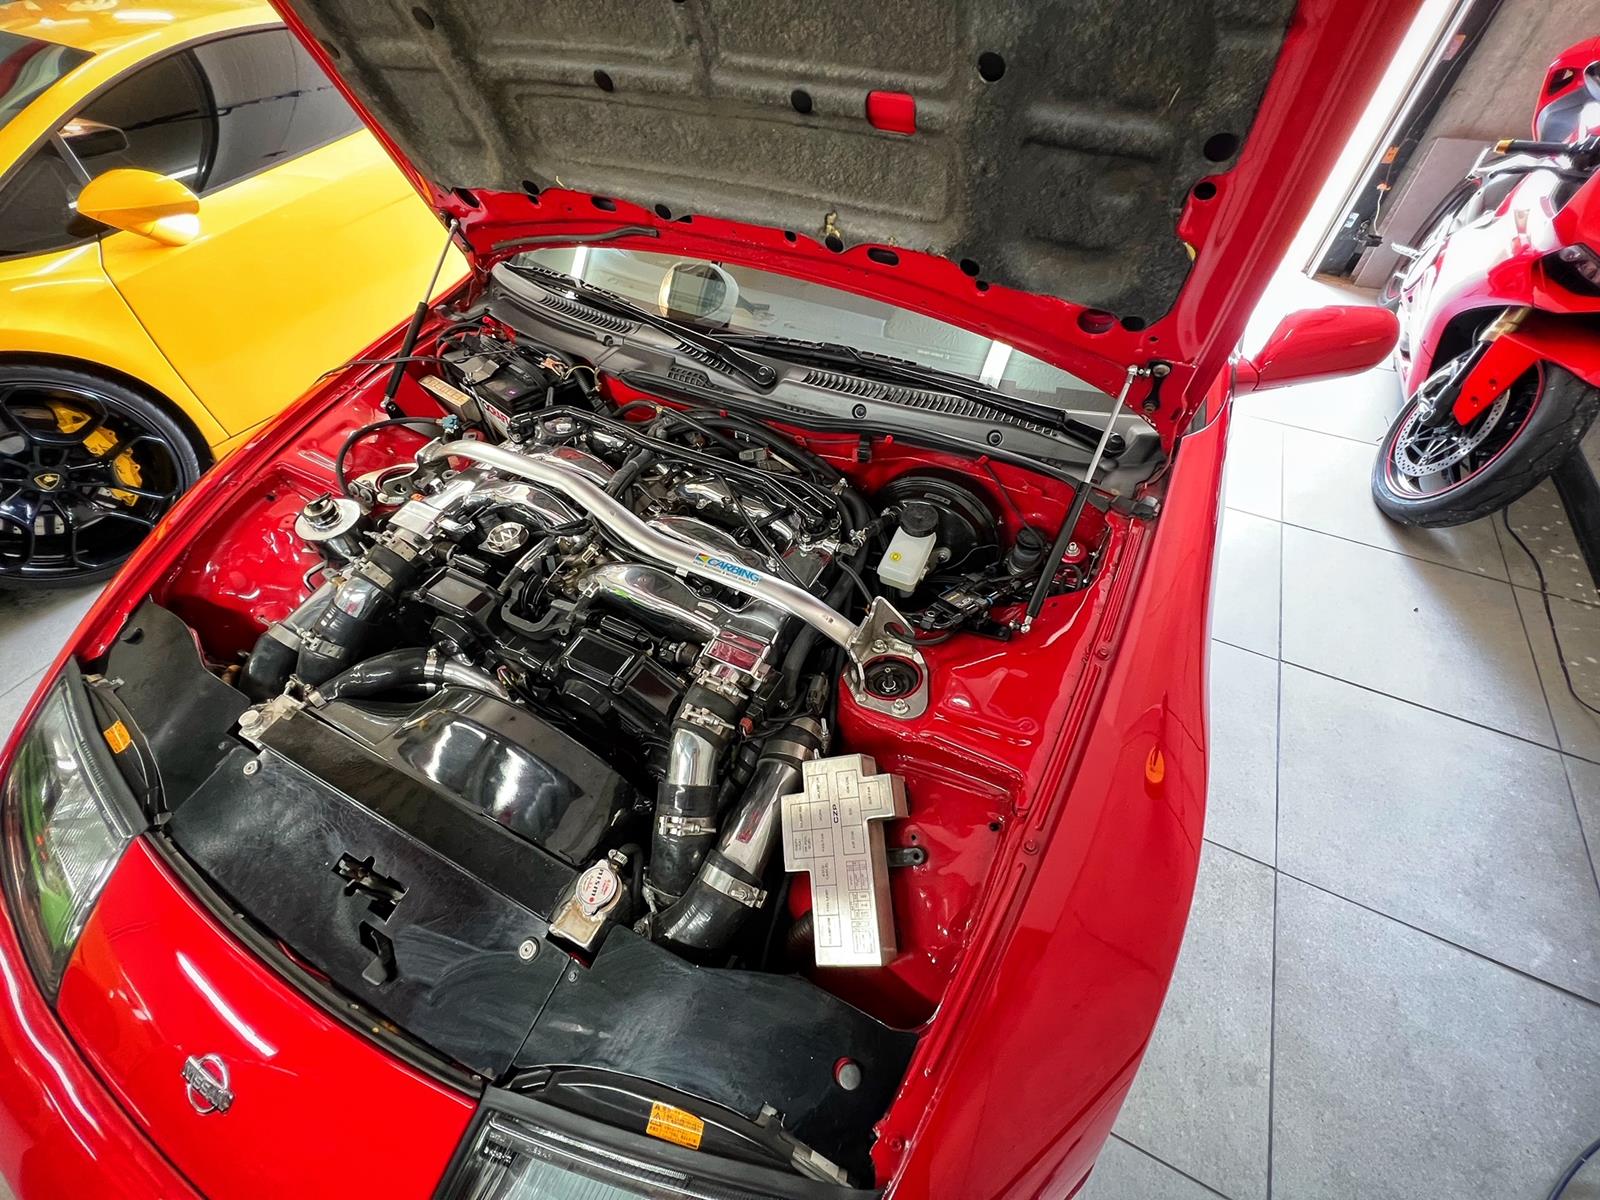
Go test drive and enjoy a much better braking experience with a future proofed setup. The diaphragm on the 370Z is larger than the Z32 and newer and probably a better design. My pedal feel didn’t change when I went from stock brakes to Stoptechs on the Z. It feels much better now and stops great with very good oem like control even without the bias valve (which I suspect was just early 90’s Nissan being Nissan).
Hope this helps and if have questions email and I'll do my best to help out.
|


 21:27:06 05/24/23