| clearance. NOTE: (this is mainly for new guys, as you veterans will probably just find this annoying, lol) I should've pulled the engine! And I would have if I had known I was going to be R&R-ing engine mounts! I recommend you pull the engine if your intention is to R&R the engine mounts! None of what I'm doing started with anything that required pulling the engine, but as many have stated you start one single thing and wind up doing a bunch of other things. If you absolutely refuse to pull the engine to R&R the engine mounts and want to torque the top nuts, read on..... I already had a bunch of things out of the way trying to get the top engine mount nut off. The ratcheting gear wrenches are nearly a requisite, but if you have a 1/4" drive 14mm socket and a tiny 1/4" drive ratchet, you can get a lot done that way, too. I won't get into the driver side because there's really nothing that creates a big clearance problem besides the A/C compressor but even that doesn't cause much problem. However, torqueing that side's nut with the torque wrench is the same strategy. I removed the Power Steering rear hose and reservoir for clearance. Some other obvious items have to come out as well (plastic turbo pipes, etc). This is the passenger side in the pic below. The arrows point to parts that are in the way of you trying to swing your tool. The lower left-pointing arrow is pointing at the Power Steering hose. You NEED ROOM TO SWING wrenches/ratchets. Getting an air-tool down in there is iffy. Maybe a 1/4" drive air-ratchet with big-time torque and a u-joint on the air-hose connector? 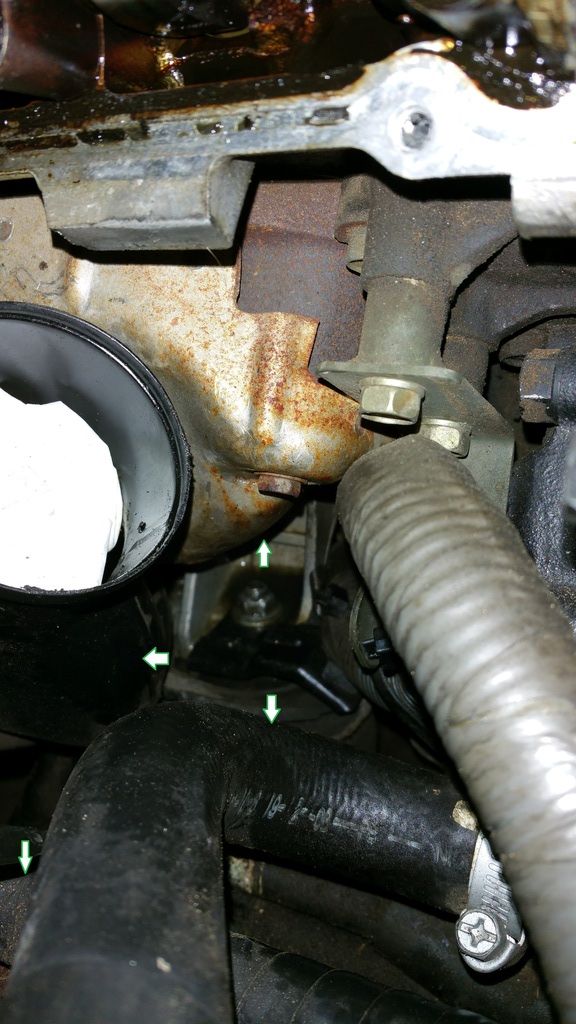
Sidenote: don't forget to re-position the black, metal wiring-loom bracket on the engine mount bolt on the passenger side before you re-install the nut. So I get the nut started and just go swing crazy getting it as tight as I can. Lots of little arcs. So many that I started to think that the bolt must've ripped loose and was moving with the nut! EEK! Thankfully that was not the case!
Sidenote: on the driver side, the top of the bolt is so close to the turbo pipe that you cannot get a wrench or socket over the top of the nut; you must spin the nut down some by fingertips or stubby open end wrench first. Now, how to torque it down? BTW, here are the torque numbers which I could not find anywhere on the internet, including not on TT.net as the engine re-assembly tech page says "torque down tight," but they are in my factory manual. 
So I have to come up with some contraption to get the torque wrench force from it's horizonal leverage down vertically to a wrench on the nut. 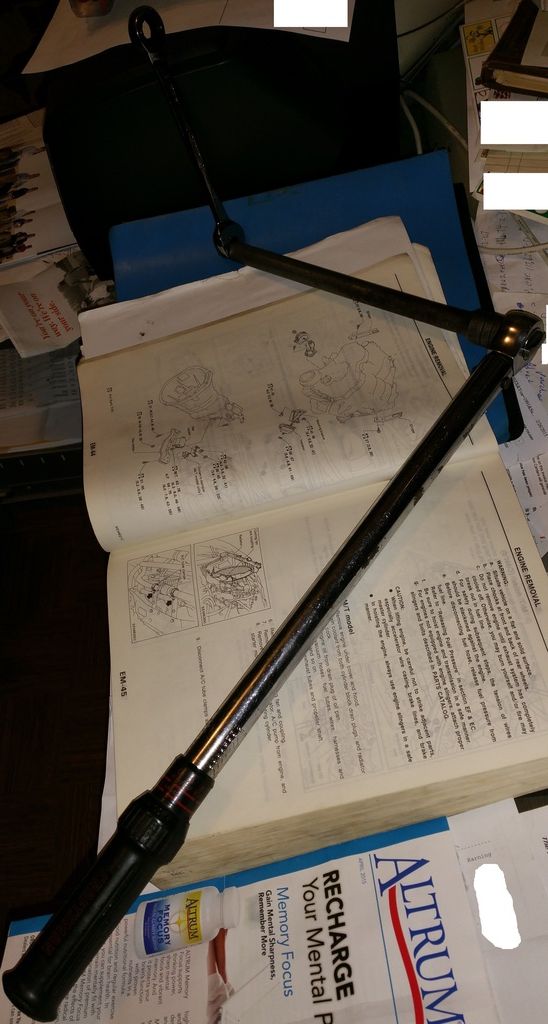
Serendipity: the open end of the 14mm ratcheting gear wrench fits the male end of the 1/2" drive extension bar. It's not snug but it doesn't slip. Then of course the torque wrench into the extension bar. Get the ratcheting hoop end of the wrench onto the nut, get the male end of the 1/2" drive extension bar into the open end of the ratcheting gear wrench, and then present turning force with the torque wrench. Even though the ratcheting end of the gear wrench spins back for another turn, the arcs are so small due to the close space that you'll want to get the nut very tight. One of you big guys might surpass the recommended torque but I found that the tight space made me fight for torque on the nut (small guy here, small hands, short arms........and old, too). If you get the nut really tight first, you won't spend a lot time trying to fiddle with the contraption to torque it. ATTENTION! You need to adjust your torque wrench DOWN in it's torque setting because you're adding extra leverage/torque turning force by way of the extra length presented by the ratcheting gear wrench. I can only use my situation as an example because I don't know exactly what your tools are like, but there is a formula.
My torque wrench is 18" from center of the socket down to the center of the HANDLE where your hand should be when you turn it. The extension bar is not included in the measurement or formula as it presents no extra force. My ratcheting gear wrench is 6.5" from the center of the hoop ratchet end to the center of the open end. wrench setting = desired torque x wrench length / (wrench length + extension length) I used the high torque number from my factory manual: 41 ft-lbs. x 18" / (18" + 6.5"),
738 / 24.5 = 30.12244897959184. Shucks I just went with 31 ft-lbs. set on my torque wrench. See more in-depth torque stuff here.....
[ http://www.freeinfostuff.com/torqueextension/torqueextension.htm ] I'm not gone blow smoke, it's a bit of a trick getting the contraption positioned and the wrench staying on the nut, and there's not much room for the wrench to swing, but the good thing is once you get it positioned, everything ratchets so you can just go back and forth instead of having to re-position the wrench every time you need another swing. And the torque is such a low setting so you get a click from the torque-wrench pretty quickly. Hope this helps even if in just some small part :)
|


 How I torqued the top engine mount nut, engine in, low -