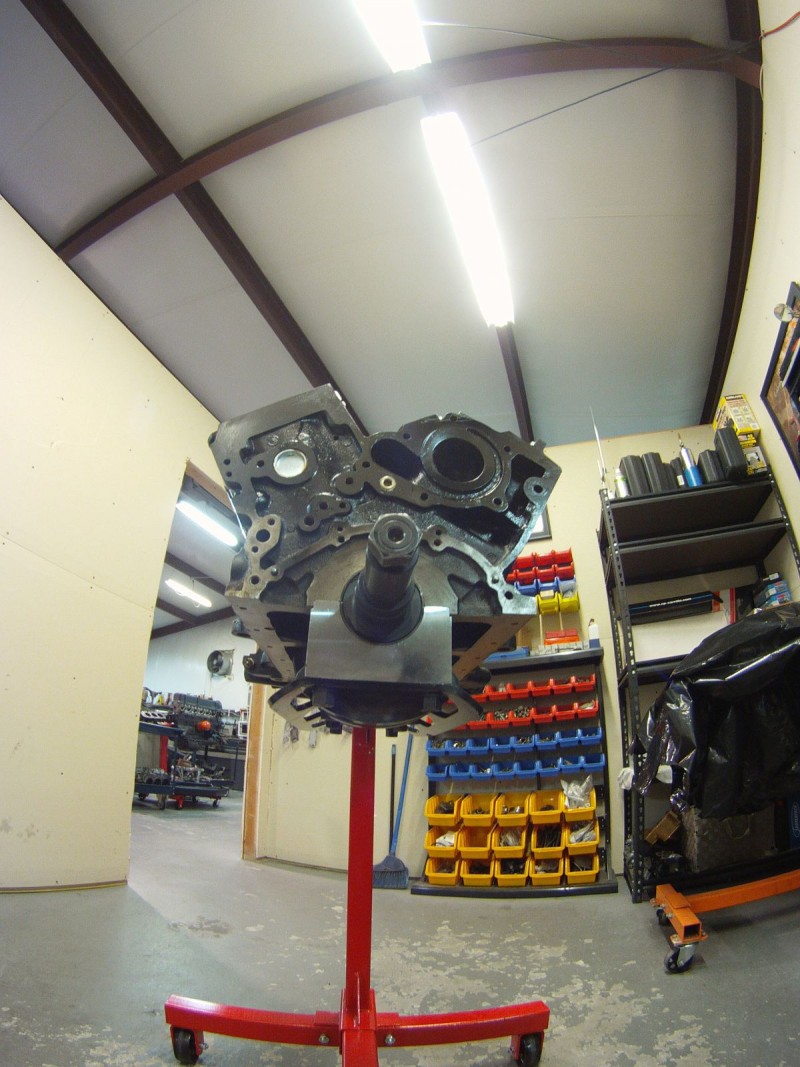
I haven't posted much in the past few months or so but for good reason. I've been excessively busy in my shop.
This year has been the busiest year I've had to date and I thank all of my EPR customers very much for this.
For a while now there have been individuals that have been pushing the envelope on producing hp.
By individuals I mean those that are willing to go above and beyond and outside the box thinking in terms of engine setups and systems put into place.
I've been very diligent in keeping up with the times and incorporating my own innovations that keep the heavy duty parts for ultra savvy owners content.
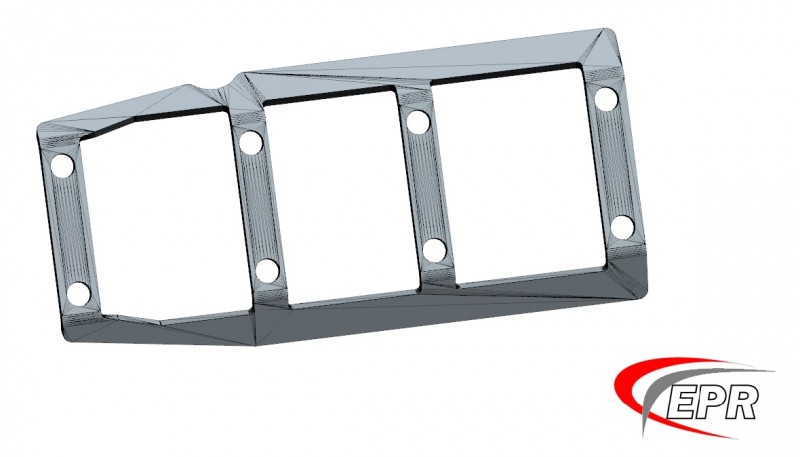
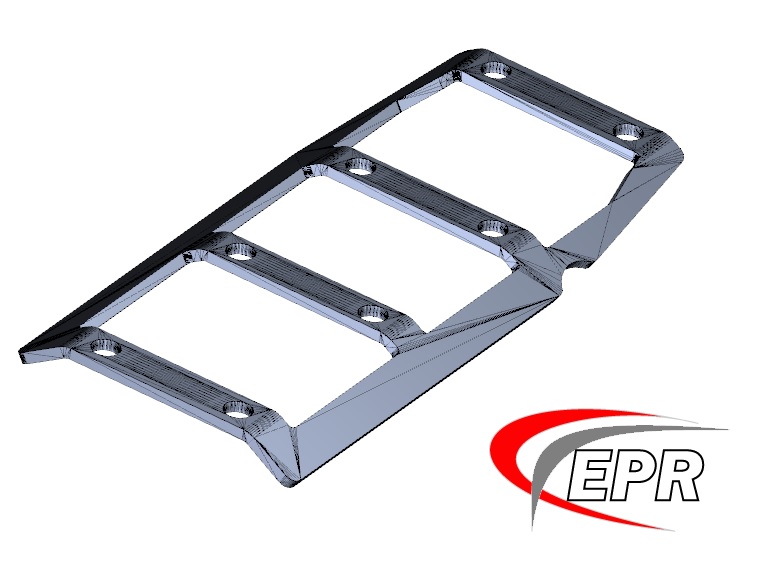
As you know, I designed/developed my own 8qt racing oil pan, produced for me by Moroso Performance,
which has seen outrageous reviews and the community really likes them and I'm very grateful for that. Means a lot to see ones product on a customers build list
or images showing it in use.
Along with that I've been designing a few other components to add to my brand of HD parts for the VG30.
Today I want to introduce to you the solution to engine block distortion issues associated with crank flex and girdle migration.

I've been seeing a trend in power production constantly rising so the need for such a component was in dire need of being engineered and produced.
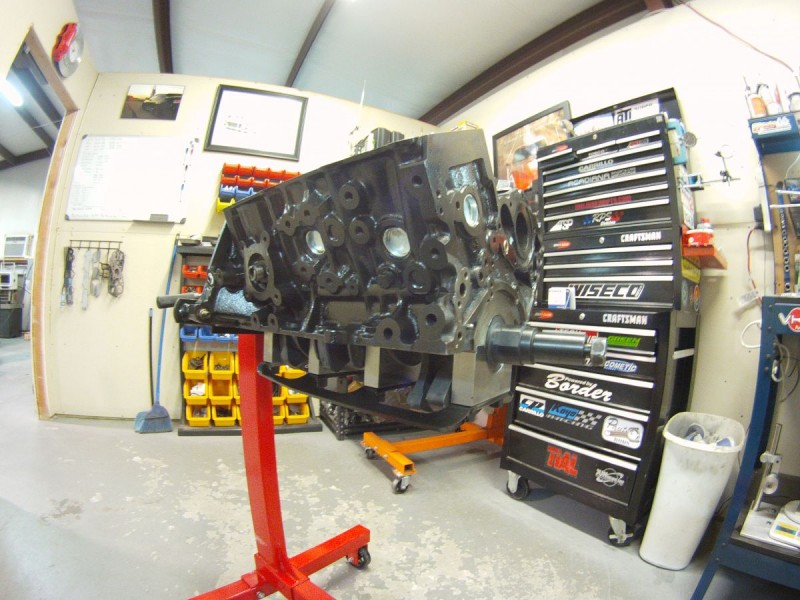
As many of you know I'm in the middle of one of the biggest builds of my shops existence which is the JUN 3.2L Project Xworx build I'm doing for a very special client
overseas. I knew with the amount of abuse he planned to put this engine through it was going to need to have a whole new approach in how to
tackle the blocks movement and distortions. So we went to the drawing board.
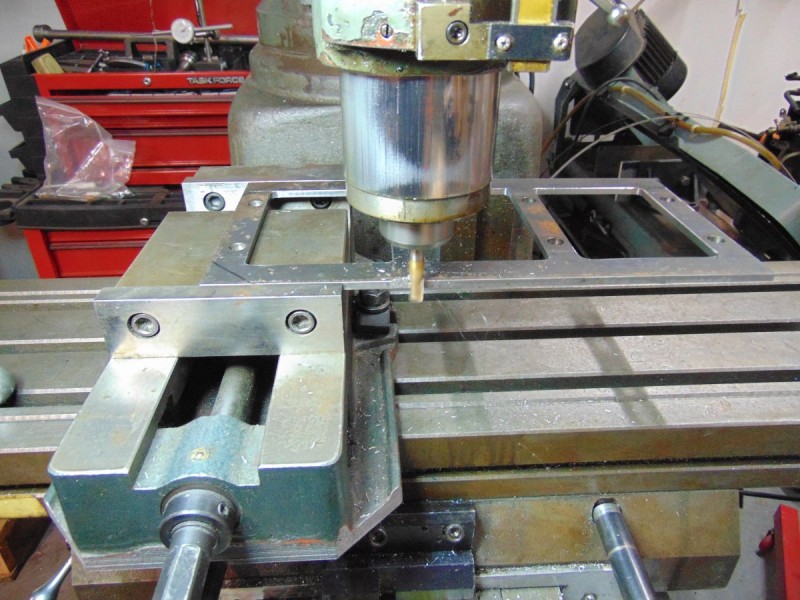
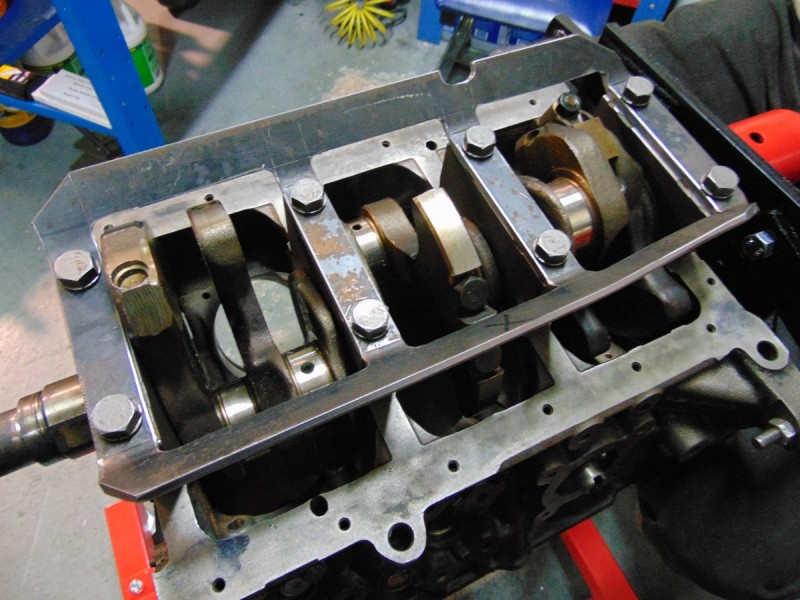
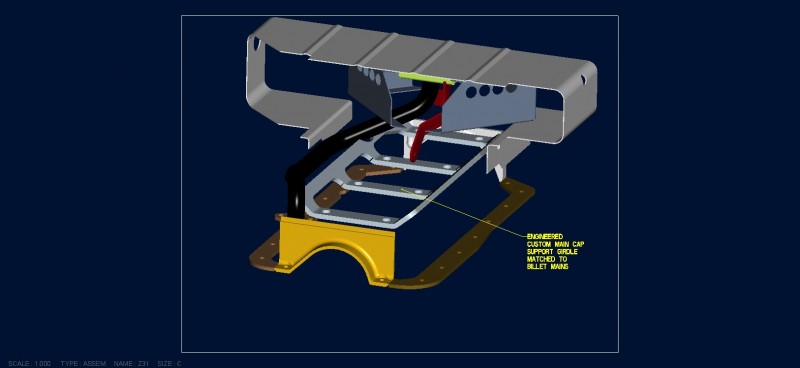
So we started off with a known good dimensional piece (stock OEM girdle). Band saw the mid sections to remove the webbing and then located on the mill to square up each cap to give us a starting point.


Then I sourced some sheet steel to plot the area to which we milled the openings and bolt holes to produce a new girdle plate.
This took some time due to the nature of the swept area the counter weights took up but after a few test fits and more clearance milling we had our dimensions set.

After the dimensions were cleared we did a final test fit of the girdle plate to verify fitment etc.
Things were moving in the right direction. Very promising thus far, so we continued.

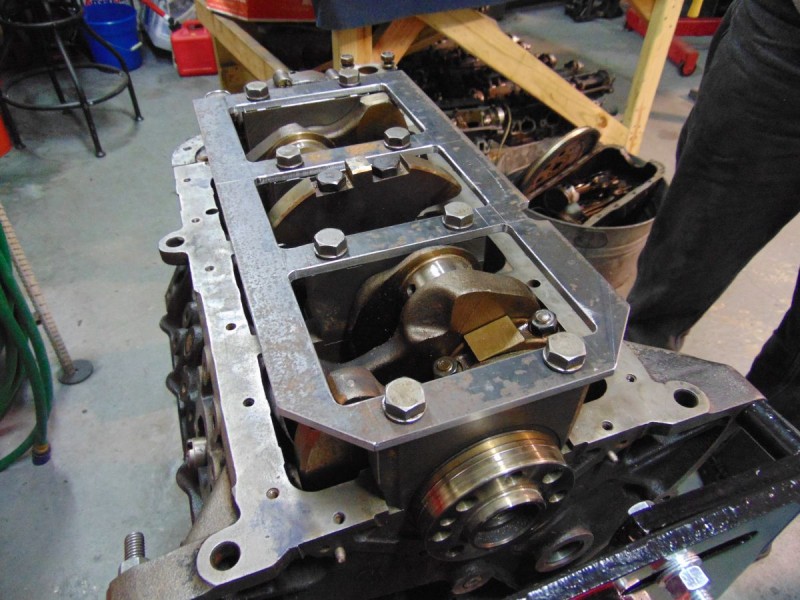
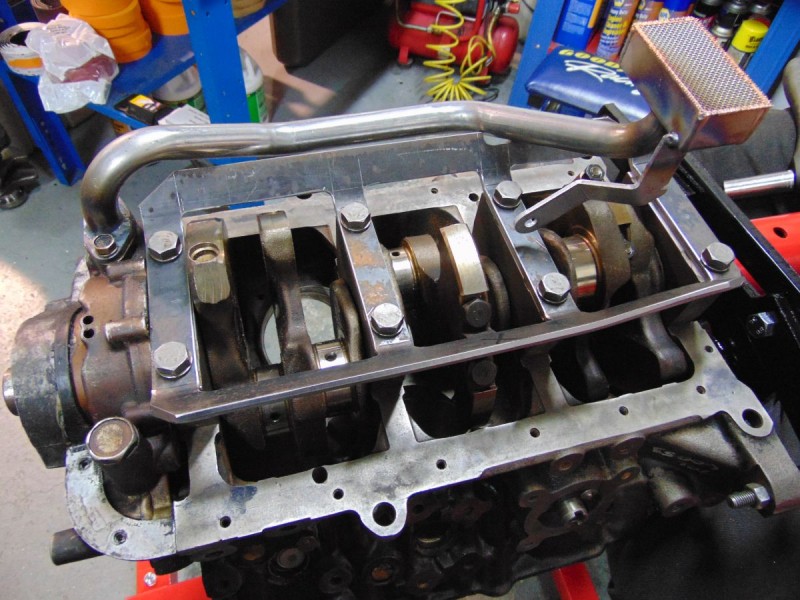
The orientation of the stock OE girdle has a raked latter bar that made a "dress" so to speak. We had to fashion the new girdle plate to
mimic this or the girdle itself would not clear the base width of the interior of the block nor oil pan.
So we began to form fit the girdle into position. It took a little massaging but in the end the unit came to.
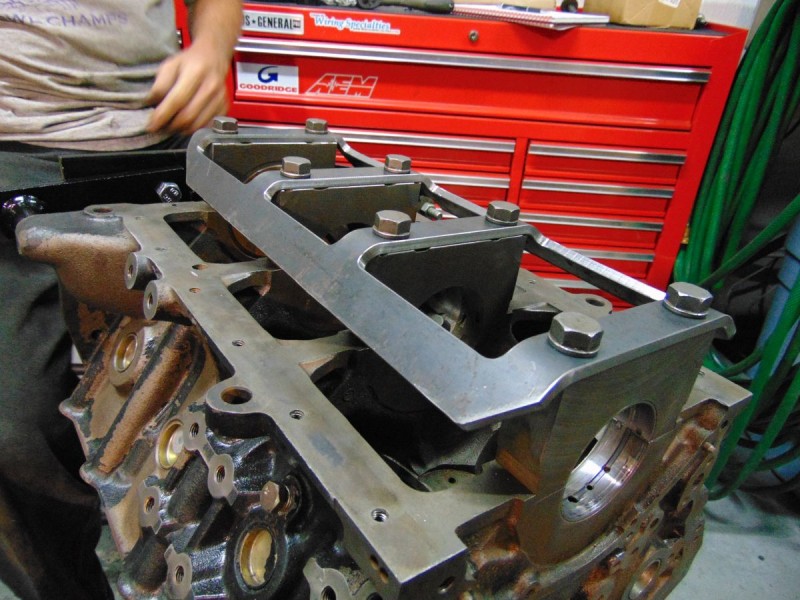
So after mocking and fitting the girdle plate we had to ensure all other components wouldn't require the girdle plate to
undergo further modification so I test fitted a pickup tube (my revised pickup tube from my oil pan offered). Sure
enough everything lined up pretty much spot on.
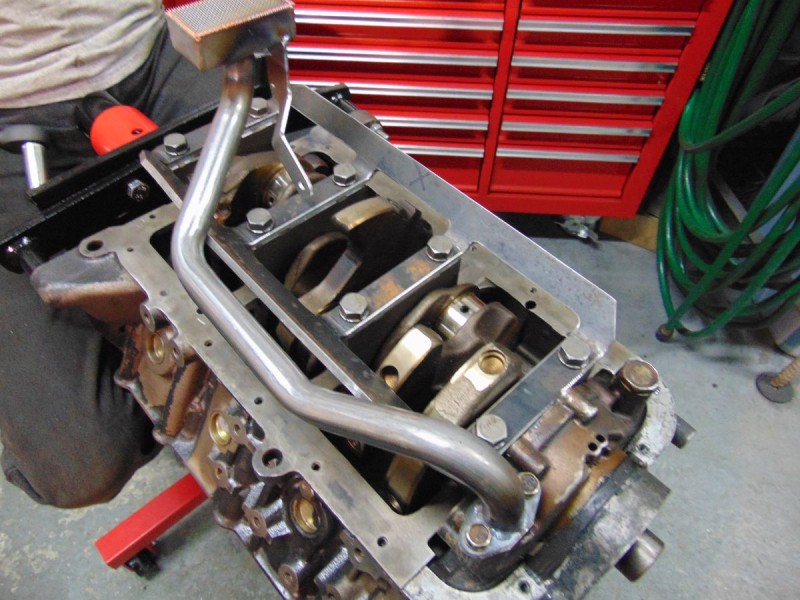
Mind you things were produced with total function in mind at this stage in the game but rest assured some sculpting and blending were to be had.
Don't worry though, the finished girdle plate itself does have the provision for the pickup tube to bolt to. Have to remember all of this was in development stages.
So now we turned our attention to cleaning up some things. Digitizing and getting things drawn up in cartoons was a good way to plot the setup and give the cnc programmer a BP to run off of.
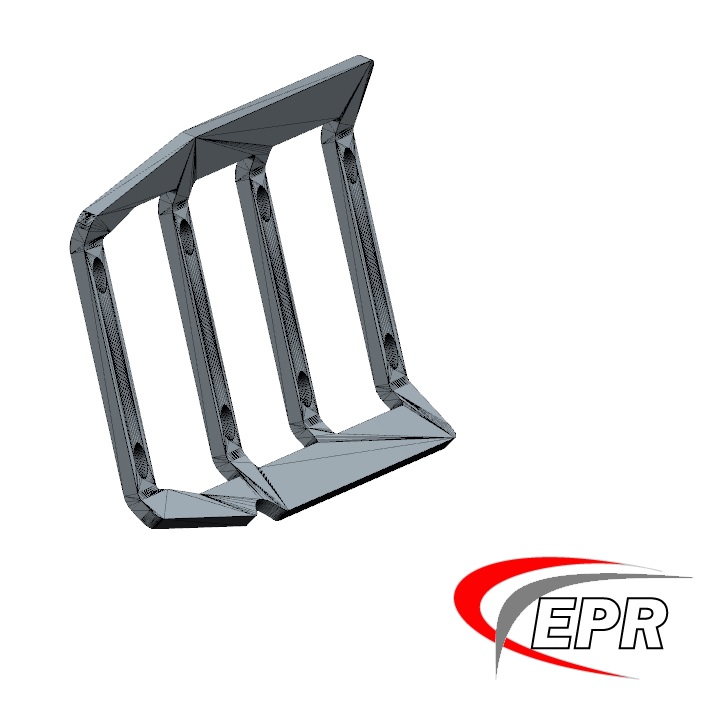
Digitizing of the billet caps were done as well so everything can be accurately produced at a moments notice.
Dove a bit further into the mockup of sorts with the girdle plate so we did an interior break down of my oil pan and showed its interior area compared.
So now we are cooking....everything matched up dimensional wise, production pieces were under way. The first assembly to be outfitted with this new
system was the big Project Xworx. Words fail me at at time like this at how beautifully laid out this system looks. To see a fruition come from literally scrap pieces
is a remarkable achievement and I'm very excited to offer this system to a much deserving and needed community.
With a line bore & line hone machining process done (required) this system is now in place. Just by installing this setup with a new crankshaft in place the "feel" of this is very pronounced over the OEM unit.
And yes...all the caps come numbered with positioning arrows plotted accordingly. I wouldn't want any of you confused on cap orientation so no worries there.


Thanks for reading and checking in. You can find the kits available for sale in the tt.net classifieds.

Ep Racing | Create Your Badge


 Introducing EPR Billet Main Cap & Girdle System -